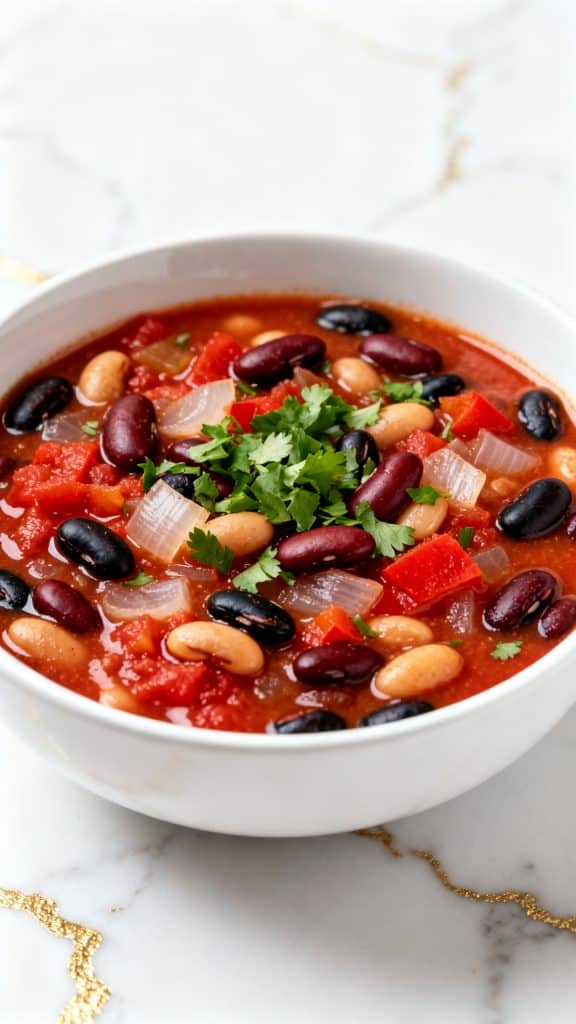
This Crockpot Vegetarian Three-Bean Chili is one of those easy meals that always turns out great.
You toss everything into the crockpot, let it cook, and come back to a rich, hearty chili packed with beans, vegetables, and warm spices.
It is filling, budget-friendly, and perfect for busy days.
Servings: 8 servings
Prep Time: 15 minutes
Cook Time: 6–8 hours on Low or 3–4 hours on High
Total Time: About 6 hours 15 minutes

Why I Love This Recipe
I started making this chili when I needed a simple dinner that didn’t require much work. One cold afternoon, I threw a few pantry ingredients into the crockpot and hoped for the best. Hours later, the house smelled amazing and dinner was ready. Since then, it has become one of my favorite comfort meals.
What I love most is how dependable it is. The ingredients are easy to find, it makes plenty of leftovers, and the slow cooking gives the chili incredible flavor.
- Uses simple pantry ingredients
- Easy to prepare in about 15 minutes
- Rich and hearty without meat
- Great for meal prep
- Budget-friendly
- Freezer-friendly
- Full of fiber and plant-based protein
What You’ll Need
- 1 tablespoon olive oil
- 1 medium onion, diced
- 1 green bell pepper, diced
- 3 cloves garlic, minced
- 1 can (15 ounces) kidney beans, drained and rinsed
- 1 can (15 ounces) black beans, drained and rinsed
- 1 can (15 ounces) pinto beans, drained and rinsed
- 2 cans (14.5 ounces each) diced tomatoes
- 1 can (15 ounces) tomato sauce
- 2 cups vegetable broth
- 2 tablespoons chili powder
- 1 teaspoon ground cumin
- 1 teaspoon smoked paprika
- 1 teaspoon salt
- ½ teaspoon black pepper
- ¼ teaspoon cayenne pepper (optional)
- 2 tablespoons chopped fresh cilantro for garnish

Why This Recipe Works (Quick Science)
The slow cooker gives the spices plenty of time to spread through the liquid and beans. As the chili cooks, the tomatoes break down and combine with the vegetable broth to create a richer flavor. The beans absorb some of the seasoned liquid, making every bite taste better. Slow cooking also helps the vegetables become tender without turning mushy.
Pro Tips
- Drain and rinse the beans well to keep the chili from tasting too salty.
- Dice the onion and bell pepper into small pieces so they cook evenly.
- If you like thicker chili, remove the lid during the last 30 minutes of cooking.
- Add the cilantro right before serving for the freshest flavor.
- Let the chili sit for 10 minutes after cooking to help the flavors settle.
Tools Required
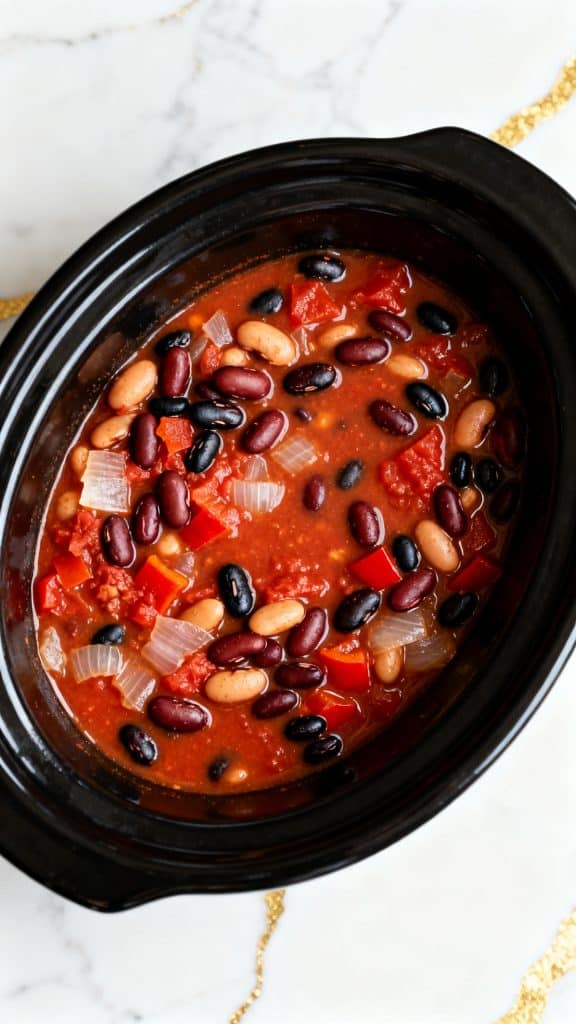
- Black oval crockpot
- Cutting board
- Chef knife
- Measuring spoons
- Measuring cup
- Can opener
- Wooden spoon
- Serving ladle
Substitutions and Variations
- Use red bell pepper instead of green bell pepper.
- Add 1 cup frozen corn.
- Replace pinto beans with cannellini beans.
- Use fire-roasted tomatoes for extra flavor.
- Add diced jalapeño for more heat.
- Stir in cooked sweet potatoes during the last hour.
Make Ahead Tips
- Chop the onion and bell pepper one day ahead.
- Measure the spices ahead of time.
- Combine all ingredients in the crockpot insert and refrigerate overnight before cooking.
Recipe Instructions
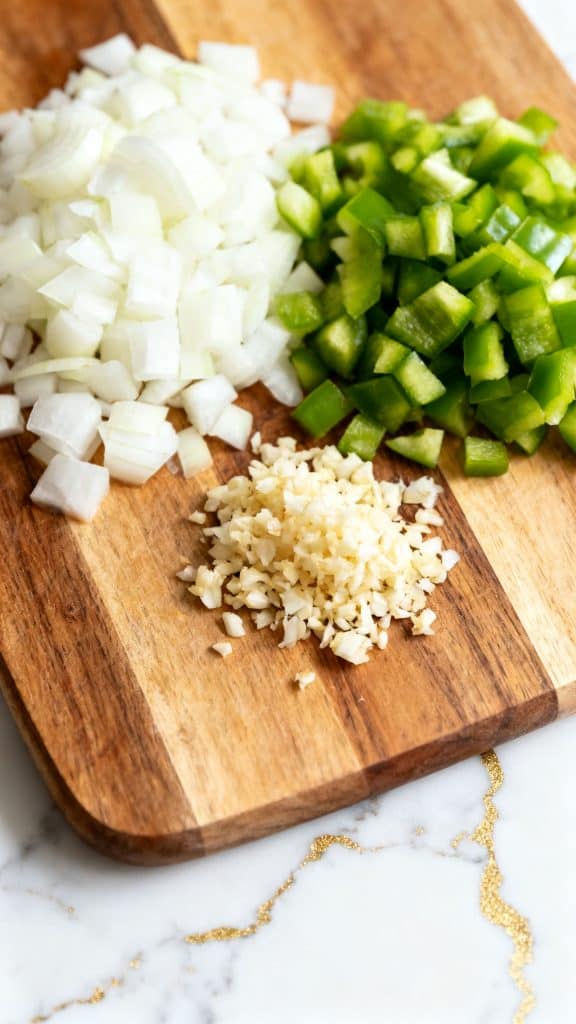
Step 1: Prepare the Vegetables
Dice 1 medium onion and 1 green bell pepper. Mince 3 cloves garlic.
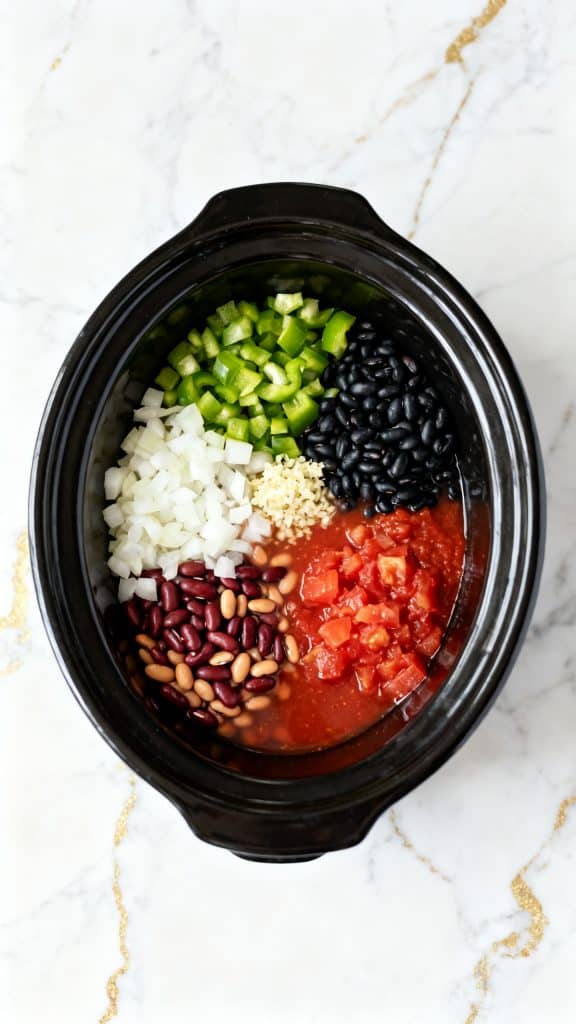
Step 2: Add Ingredients to the Crockpot
Add 1 tablespoon olive oil, diced onion, diced green bell pepper, minced garlic, 1 can drained kidney beans, 1 can drained black beans, 1 can drained pinto beans, 2 cans diced tomatoes, 1 can tomato sauce, and 2 cups vegetable broth to the crockpot.
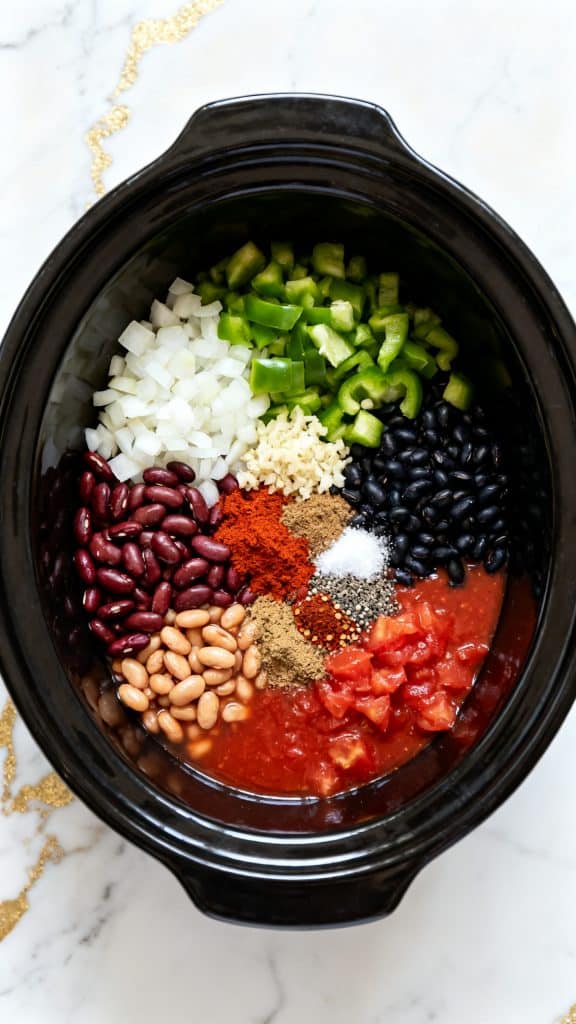
Step 3: Add the Seasonings
Sprinkle in 2 tablespoons chili powder, 1 teaspoon ground cumin, 1 teaspoon smoked paprika, 1 teaspoon salt, ½ teaspoon black pepper, and ¼ teaspoon cayenne pepper if using.
Step 4: Stir Everything Together
Use a wooden spoon to mix all ingredients until evenly combined.
Step 5: Slow Cook the Chili
Cover and cook on Low for 6–8 hours or High for 3–4 hours until the vegetables are tender and the chili is rich and thick.
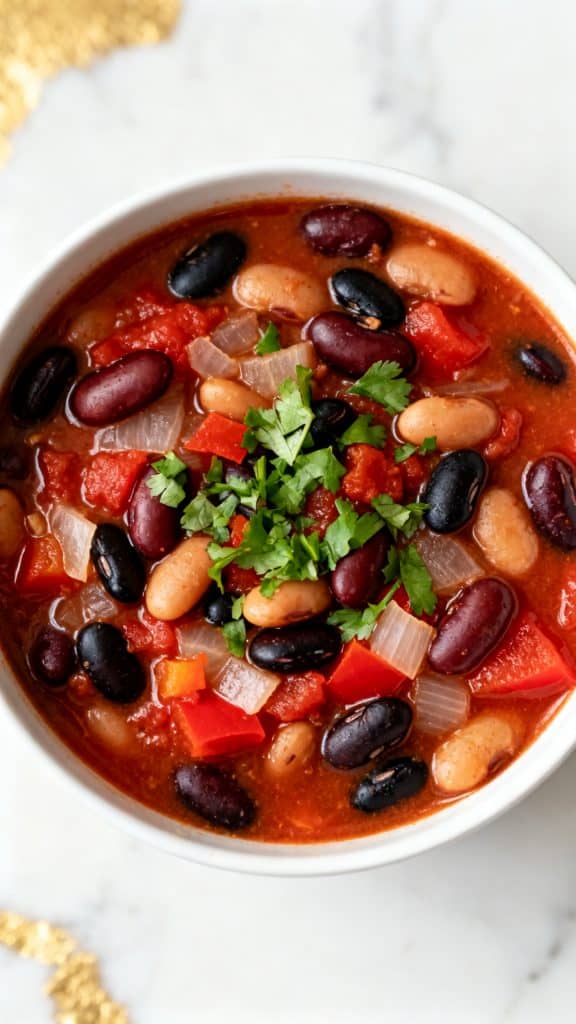
Step 6: Garnish and Serve
Ladle the chili into bowls and top with 2 tablespoons chopped fresh cilantro.
Common Mistakes
- Forgetting to drain and rinse the beans.
- Adding too much broth, which makes the chili thin.
- Not stirring the ingredients before cooking.
- Opening the lid too often during cooking.
- Under-seasoning the chili before serving.
What to Serve With
- Cornbread
- Tortilla chips
- Baked potatoes
- Rice
- Green salad
- Avocado slices
- Corn muffins
- Crusty bread
Macros Information
Per Serving (Approximate)
- Calories: 255
- Protein: 13g
- Carbohydrates: 39g
- Fiber: 12g
- Fat: 6g
- Saturated Fat: 1g
- Sodium: 670mg
- Sugar: 7g
Leftovers and Storage
- Store in an airtight container in the refrigerator for up to 5 days.
- Freeze for up to 3 months.
- Thaw overnight in the refrigerator before reheating.
- Reheat on the stovetop or in the microwave until hot throughout.
- Chili often tastes even better the next day.
FAQ
Q: Can I cook this on High instead of Low?
A: Yes. Cook for 3 to 4 hours on High.
Q: Can I freeze this chili?
A: Yes. Let it cool completely before freezing.
Q: Can I make it spicier?
A: Add extra cayenne pepper or diced jalapeños.
Q: Is this recipe vegan?
A: Yes, as written, it is vegan.
Q: How can I make it thicker?
A: Cook uncovered for the last 30 minutes or mash some of the beans before serving.
Q: Can I add more vegetables?
A: Yes. Corn, zucchini, carrots, and sweet potatoes work well.
Final Thoughts
This Crockpot Vegetarian Three-Bean Chili is simple, hearty, and packed with flavor. It is the kind of meal that makes dinner easy while still feeling homemade and comforting. Whether you make it for meal prep, a cozy family dinner, or a busy weekday, this recipe delivers every time. Give it a try, and don’t forget to leave a comment sharing how it turned out and any questions you may have.