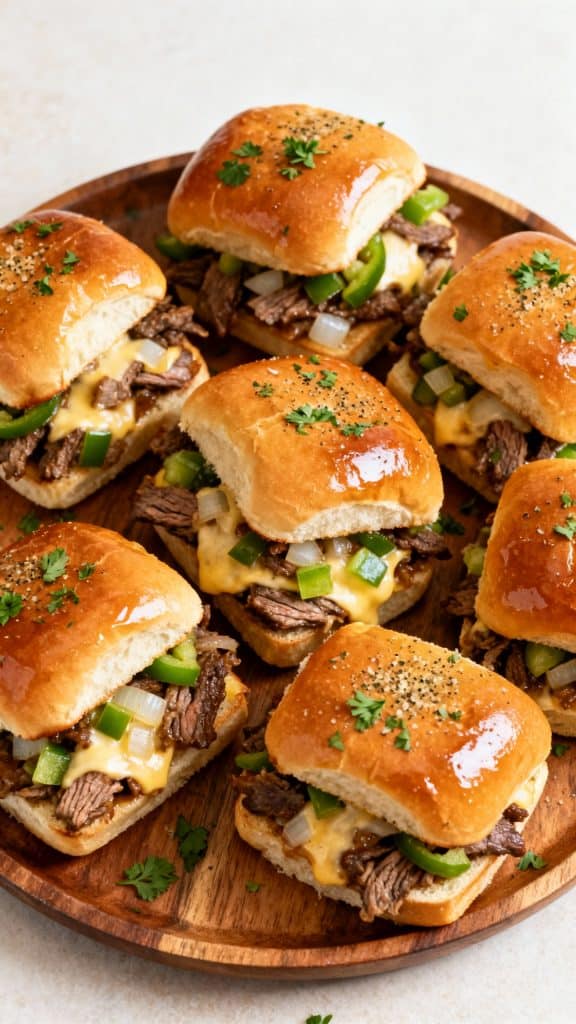
These Philly Cheesesteak Sliders are the ultimate cheesy, savory, melty snack. Super quick to throw together, they’re perfect for game day, movie night, or just when you’re craving something warm and comforting.
You’ve got tender beef, soft onions and peppers, melted provolone, and buttery toasted slider rolls—all in one bite. They taste like your favorite sandwich but are even easier to make. Let’s go!

Why I Love This Recipe
This is one of those recipes I keep coming back to because it never fails. I first made these for a weekend movie night, and now they’ve become a go-to. They’re fun to eat, easy to share, and so satisfying. You get that classic cheesesteak flavor without needing a grill or a hoagie roll.
- All-in-one flavor-packed bites
- Super customizable
- Feeds a crowd fast
- Great way to use up leftover steak
- Takes under 30 minutes!
Servings: 12 sliders
Prep time: 10 minutes
Cook time: 15 minutes
Total time: 25 minutes
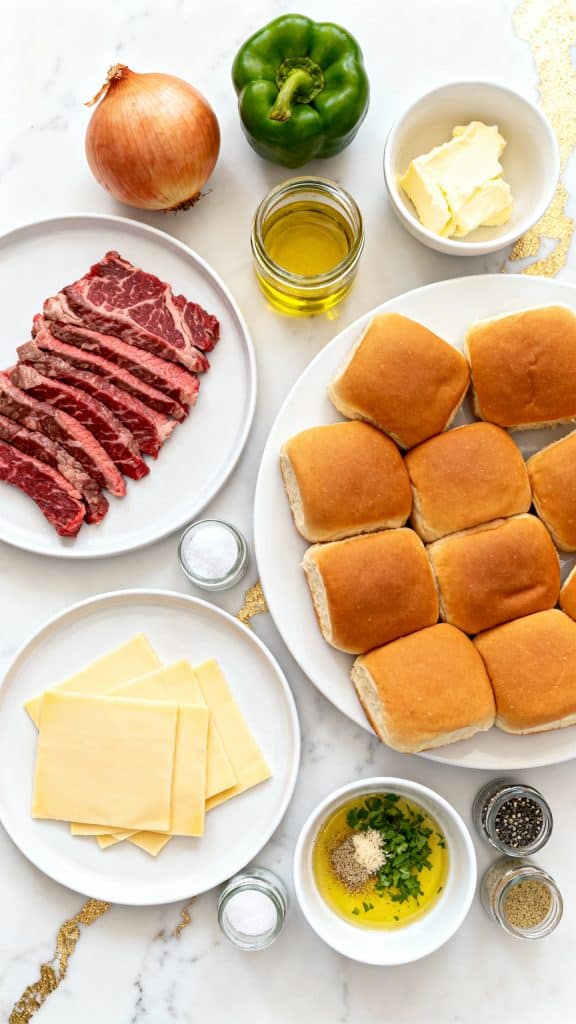
What You’ll Need
- 1 tablespoon olive oil
- 1/2 tablespoon unsalted butter
- 1 medium onion, diced
- 1 green bell pepper, diced
- 1 ½ pounds thinly sliced ribeye steak
- 1 teaspoon salt
- 1/2 teaspoon black pepper
- 1/2 teaspoon garlic powder
- 12 slider rolls (Hawaiian or regular dinner rolls)
- 6 slices provolone cheese
- 2 tablespoons melted butter
- 1/2 teaspoon dried parsley
- 1/4 teaspoon garlic powder (for butter topping)
Pro Tips
- Freeze your ribeye for 20 minutes before slicing—it’s easier to get it super thin.
- Don’t skip sautéing the veggies; it gives that classic cheesesteak flavor.
- Use provolone for the best melt and flavor combo.
- Toast the bottom buns a bit before assembling so they don’t get soggy.
- Press down lightly on the sliders before baking to help everything stick together.
Tools You’ll Need
- Large skillet
- Cutting board + knife
- 9×13 baking dish
- Small mixing bowl
- Pastry brush or spoon (for butter topping)
- Foil (optional)
Substitutions and Variations
- Swap provolone with mozzarella or white American cheese
- Use leftover roast beef instead of steak
- Try red bell pepper for a sweeter flavor
- Add mushrooms for extra umami
- Use brioche buns for a richer bite
Make Ahead Tips
You can cook the filling up to 2 days ahead. Store it in the fridge and just assemble and bake when you’re ready.
Let’s Cook
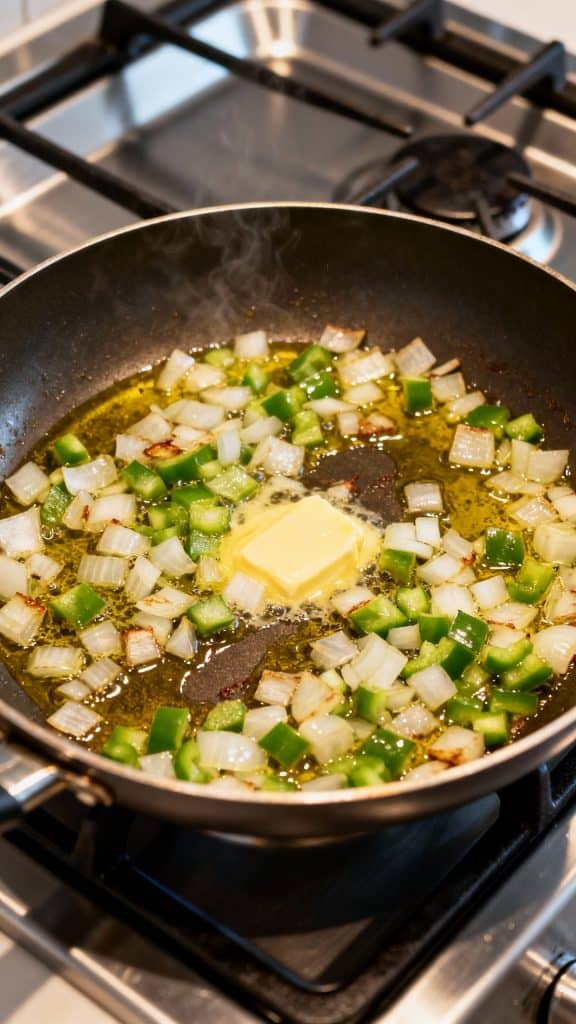
Step 1: Cook the Veggies
In a large skillet, heat 1 tablespoon olive oil and 1/2 tablespoon butter over medium heat. Add 1 diced onion and 1 diced green bell pepper. Cook for 4–5 minutes, stirring often, until softened and just starting to caramelize.
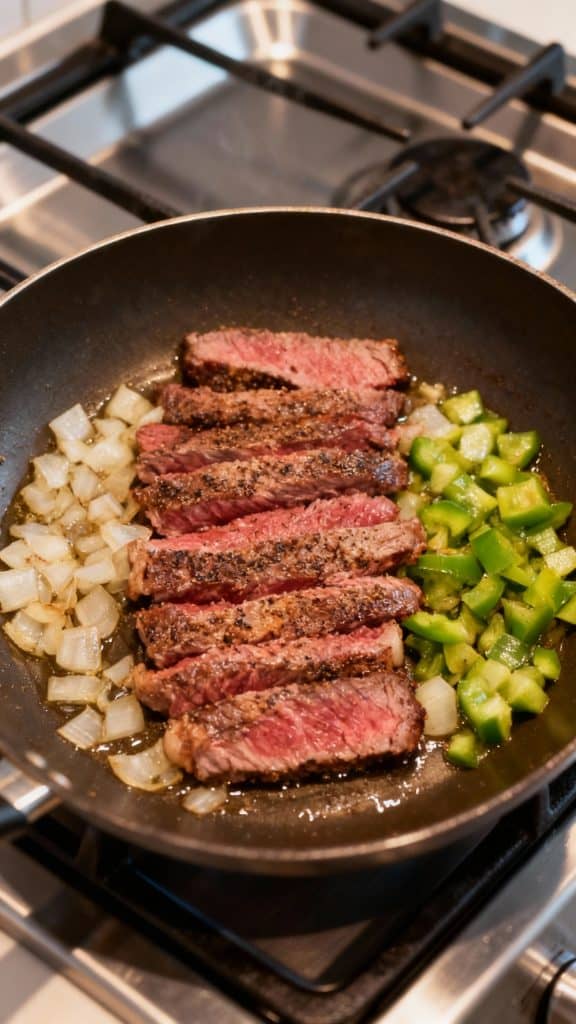
Step 2: Cook the Steak
Add 1 ½ pounds thinly sliced ribeye steak to the skillet. Season with 1 teaspoon salt, 1/2 teaspoon black pepper, and 1/2 teaspoon garlic powder. Cook for 4–5 minutes, stirring often, until beef is cooked through and browned.
Step 3: Prep the Rolls
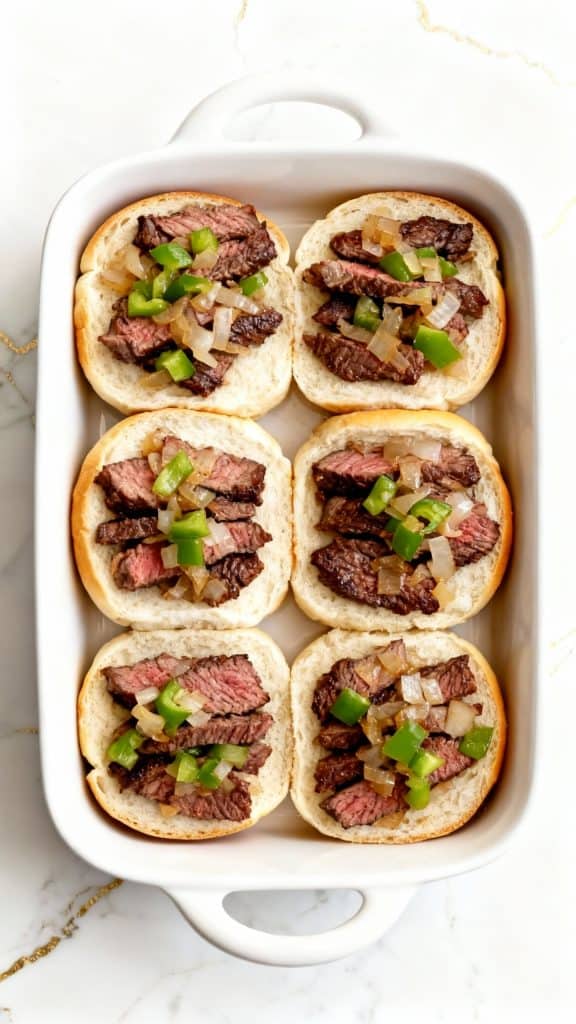
Slice the 12 slider rolls in half horizontally (keep them connected if you can). Place the bottom half in a 9×13 baking dish.

Step 4: Layer the Filling
Spoon the hot steak, pepper, and onion mixture evenly across the bottom rolls.
Step 5: Add the Cheese
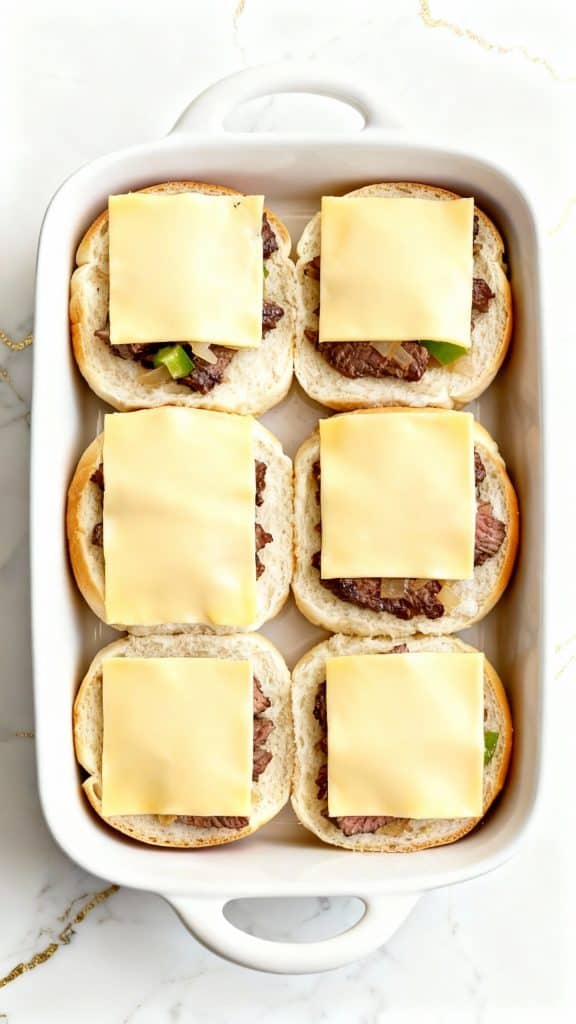
Lay 6 slices of provolone cheese over the meat mixture so they cover the whole surface.
Step 6: Top and Butter
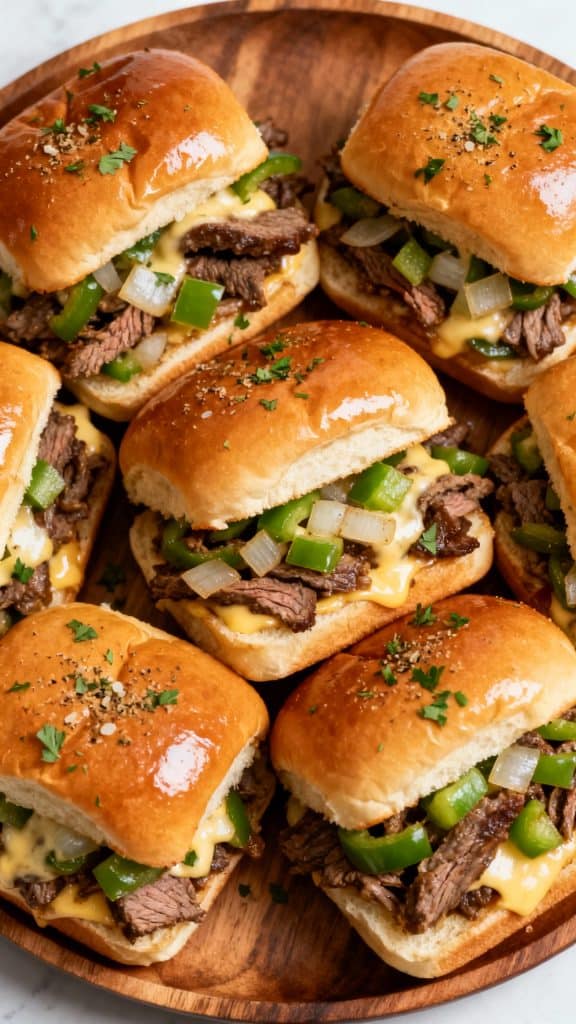
Place the top half of the rolls back on. In a small bowl, mix 2 tablespoons melted butter, 1/2 teaspoon dried parsley, and 1/4 teaspoon garlic powder. Brush it all over the tops of the rolls.

Step 7: Bake
Bake at 350°F for 10–12 minutes until the cheese is melted and tops are golden brown. Let cool for 2–3 minutes, then serve.
Leftovers and Storage
Wrap leftovers tightly in foil or place in an airtight container. Store in the fridge for up to 3 days. Reheat in the oven at 300°F until warm, or microwave for about 30 seconds.
Why This Recipe Works (Quick Science)
Cooking the onions and peppers in butter helps release their natural sugars, making them sweet and savory. Thinly sliced beef cooks quickly, so it stays tender. The provolone cheese melts just right, binding everything together. Brushing the tops with seasoned butter adds flavor and keeps them soft but golden.
Common Mistakes
- Cutting the steak too thick—it won’t cook evenly
- Skipping the veggie sauté step—raw peppers and onions don’t taste the same
- Not pressing down the sliders before baking—helps keep the filling in
- Overbaking—they’ll dry out fast
What to Serve With
- Crinkle fries or sweet potato fries
- Coleslaw or a crisp green salad
- Pickles on the side
- A dipping sauce like garlic aioli or chipotle mayo
FAQ
Can I use a different cheese?
Yes! Mozzarella, white American, or cheddar all work.
What cut of beef is best?
Ribeye is classic, but flank steak or shaved beef works too.
Can I make these ahead of time?
You can prep the filling ahead, but assemble and bake just before serving for best results.
Can I freeze them?
Not really recommended—the texture of the bread changes when frozen and reheated.
Final Thoughts
These Philly Cheesesteak Sliders are straight-up crave-worthy. They’ve got everything you love about a cheesesteak, packed into handheld bites. Make them once and you’ll be hooked. If you try it out, drop a comment and let me know how it went or if you have any questions—I’d love to hear from you!