Ever have leftover mashed potatoes and not know what to do with them? This is it.
Crispy on the outside, fluffy on the inside, these mashed potato waffles are chef’s kiss.
You throw it all in a waffle iron, close the lid, and wait for the magic.
We’ve made these on lazy Sundays, busy weeknights, and whenever we needed comfort food with a little crunch.
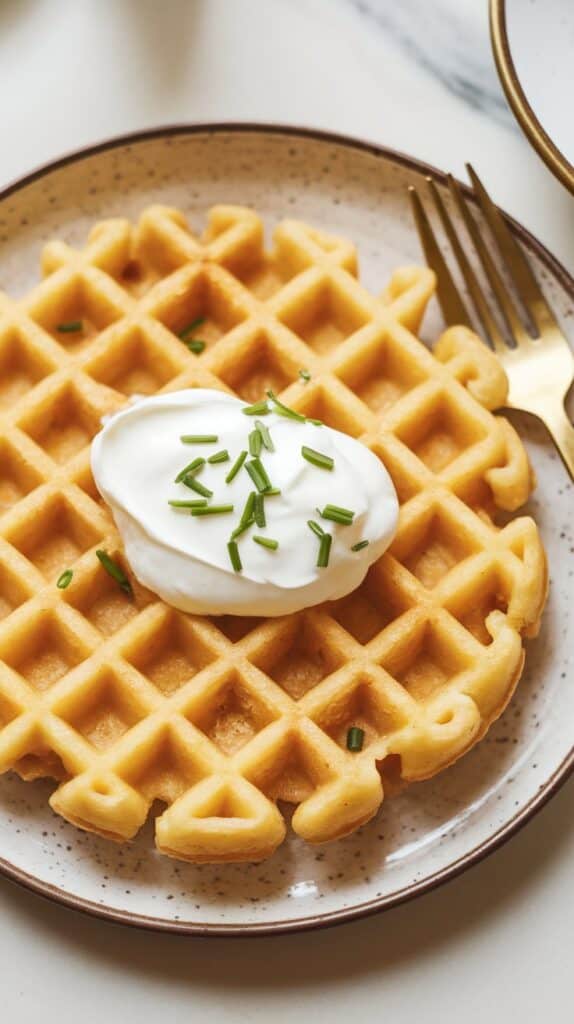
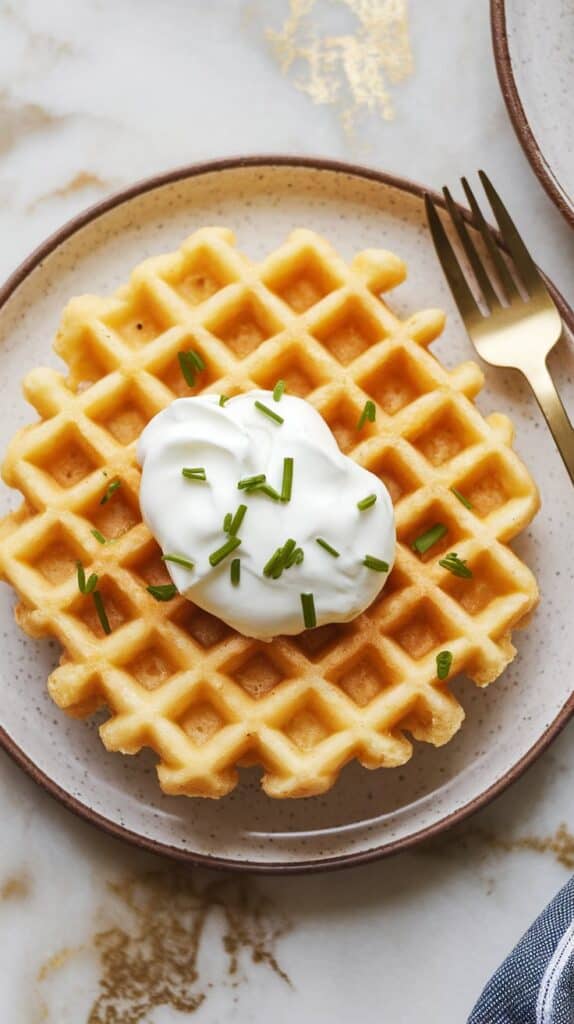
Add a dollop of sour cream, maybe a sprinkle of chives, and you’ve got a dish that feels way fancier than it actually is.

What You’ll Need
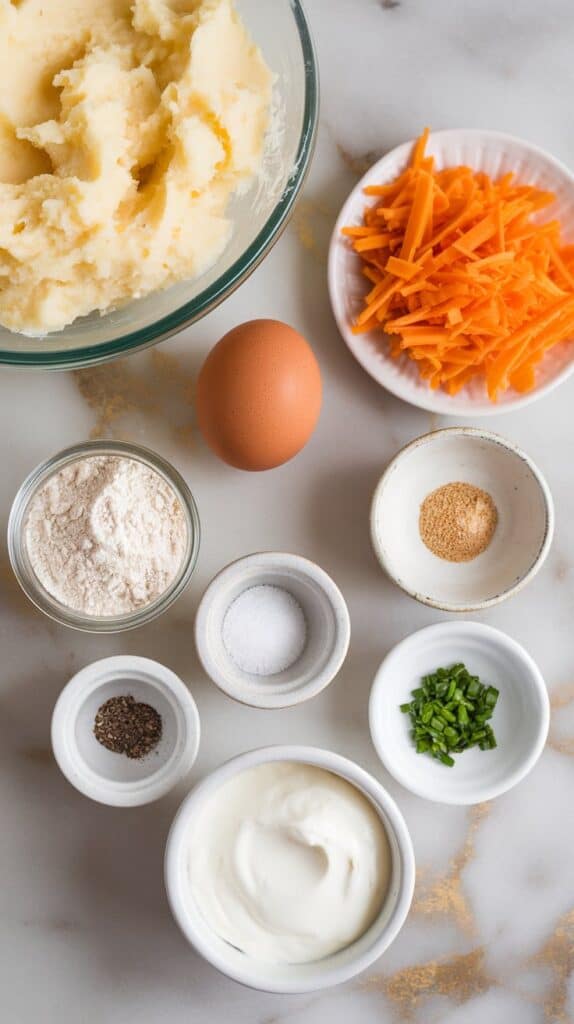
- 2 cups cold mashed potatoes
- 1 large egg
- ½ cup shredded cheddar cheese
- ¼ cup all-purpose flour
- ¼ teaspoon garlic powder
- ¼ teaspoon onion powder
- Salt and black pepper to taste
- Non-stick spray or a little butter for greasing the waffle iron
- Sour cream, for topping
- Fresh chopped chives (optional)
Why I Love This Recipe
I started making these when we had too many mashed potatoes after a holiday dinner. Now, I make mashed potatoes just so I can turn them into waffles. They hit that comfort food spot every time. Here’s why you’ll love them too:
- Perfect way to use up leftovers
- You can customize them with whatever cheese or herbs you like
- They’re crispy without deep frying
- Super quick and easy cleanup
- Tastes like a mix between hash browns and loaded baked potatoes
Makes: 2 large waffles
Total Time: 15 minutes
Macros (Per Serving, Based on 2 Servings)
- Calories: ~310
- Protein: 11g
- Carbs: 28g
- Fat: 18g
- Fiber: 2g
Why This Recipe Works (Quick Science)
The flour and egg help bind the mashed potatoes so they don’t fall apart in the waffle iron. The cheese adds flavor and gets melty and crispy when cooked. The hot waffle iron creates steam inside the waffle, which keeps it soft in the middle while the outer edges get golden and crispy from direct heat. No need for frying — it crisps up perfectly on both sides.
Common Mistakes
- Using hot mashed potatoes – They’ll be too soft and won’t crisp. Cold potatoes hold together better.
- Skipping the flour or egg – You need both to hold everything together.
- Overfilling the waffle iron – It’ll ooze out and get messy.
- Opening the iron too soon – Wait until the steam slows down, that’s when you know it’s crisping up.
What to Serve With
- A fried or poached egg on top
- Crisp bacon or sausage on the side
- Simple green salad with a tangy vinaigrette
- A drizzle of hot sauce or sriracha for a spicy kick
FAQ
Can I use instant mashed potatoes?
Yes, just make sure they’re fully chilled and not too watery.
Can I freeze them?
Yes! Let them cool, then freeze between layers of parchment. Reheat in toaster or oven.
Do I need a Belgian waffle maker?
Nope — any waffle iron works! Just don’t overload it.
Can I skip the cheese?
Sure, but it adds great flavor and crispiness. Try a dairy-free cheese if needed.
Substitutions and Variations
- Use mozzarella or pepper jack instead of cheddar
- Add cooked bacon bits or chopped green onions into the batter
- Swap garlic/onion powder for fresh herbs like thyme or parsley
- Gluten-free? Use almond flour or gluten-free AP flour
Tools Required
- Mixing bowl
- Spoon or spatula
- Measuring cups and spoons
- Waffle iron
- Non-stick spray or butter
- Small bowl for toppings
Make Ahead Tips
You can prep the mashed potato batter and store it covered in the fridge for up to 24 hours. Stir before using. Cooked waffles can be frozen and reheated in the toaster.
Instructions
Step 1: Mix the batter
In a medium bowl, combine 2 cups cold mashed potatoes, 1 large egg, ½ cup shredded cheddar cheese, ¼ cup all-purpose flour, ¼ teaspoon garlic powder, ¼ teaspoon onion powder, and a good pinch of salt and black pepper. Mix until well combined and no dry spots remain.
Step 2: Preheat and grease the waffle iron
Turn on your waffle iron and let it heat fully. Lightly spray with non-stick spray or spread a little butter to prevent sticking.
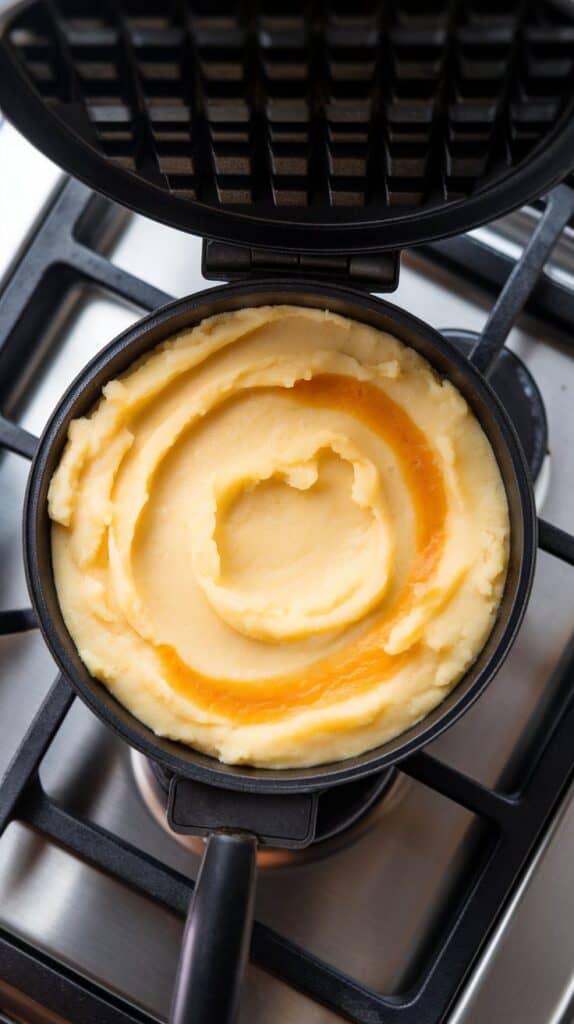
Step 3: Cook the waffles
Scoop half the batter into the center of the waffle iron and spread it out a bit (don’t overfill). Close the lid and cook for about 5–6 minutes, or until crispy and golden brown. Repeat with the rest of the batter.
Step 4: Serve and top
Place the cooked waffle on a plate, then top with a generous dollop of sour cream and a sprinkle of chopped chives if using.
Leftovers and Storage
Let waffles cool completely, then store in an airtight container in the fridge for up to 3 days. Reheat in the toaster or oven to bring back the crisp. You can also freeze them between parchment sheets for up to a month.
Go Make It!
This one’s so fun to make, and even more fun to eat. Perfect for using leftovers but tasty enough to make from scratch. I’d love to hear how yours turned out — drop a comment with your tweaks, toppings, or any questions!