This hibachi garlic butter fried rice is one of those recipes that just hits every time.
It’s buttery, garlicky, and packed with flavor. If you’ve ever sat at a hibachi table and wished you could make that rice at home—this is the one.
It’s fast, filling, and way better than takeout. I make it on repeat, and it never gets old.

Why I Love This Recipe
I first made this on a weeknight when I needed something fast but still satisfying—and now I make it all the time. It’s got that smoky hibachi flavor from cooking on high heat, plus the garlic butter just takes it to the next level.
- Uses day-old rice, so it’s perfect for leftovers
- You can add protein if you want (chicken, shrimp, steak)
- One pan and done—minimal cleanup
- It’s fast—like 20 minutes fast
- Packed with flavor and just the right amount of richness
What You’ll Need
- 4 cups cold, cooked jasmine rice (day-old is best)
- 3 tablespoons unsalted butter, divided
- 1 tablespoon neutral oil (like avocado or canola)
- 4 garlic cloves, finely minced
- 2 eggs, lightly beaten
- 1/2 cup diced carrot
- 1/3 cup frozen peas
- 2 green onions, chopped
- 2 tablespoons soy sauce
- 1 teaspoon toasted sesame oil
- Salt, to taste
- Black pepper, to taste

Pro Tips
- Use cold, day-old rice: Fresh rice turns mushy. Letting it dry out overnight gives it that perfect fried rice texture.
- High heat is key: Cook everything fast over high heat to get that smoky flavor.
- Prep everything first: This dish moves quickly—have all your ingredients ready to go.
- Use a large skillet or wok: You want room to toss everything without it steaming.
- Garlic butter goes in stages: Adding some early for flavor and more at the end makes a big difference.
Tools You’ll Need
- Large nonstick skillet or wok
- Wooden spoon or spatula
- Cutting board
- Sharp knife
- Small mixing bowls
- Measuring spoons
- Spoon for mixing eggs
Substitutions and Variations
- Rice: Use long-grain white rice or leftover basmati
- Veggies: Swap in corn, diced zucchini, or bell pepper
- Butter: Try ghee for a nuttier taste
- Soy sauce: Tamari or coconut aminos if gluten-free
- Protein: Add diced cooked chicken, shrimp, or steak
Make Ahead Tips
- Cook your rice a day ahead and refrigerate uncovered overnight for best texture
- Dice your garlic, carrots, and green onions in the morning and store them covered in the fridge
- Beat your eggs and keep them chilled so you’re ready to go
Cooking Time & Servings
- Prep time: 10 minutes
- Cook time: 10 minutes
- Servings: 4
Step-by-Step Cooking Instructions
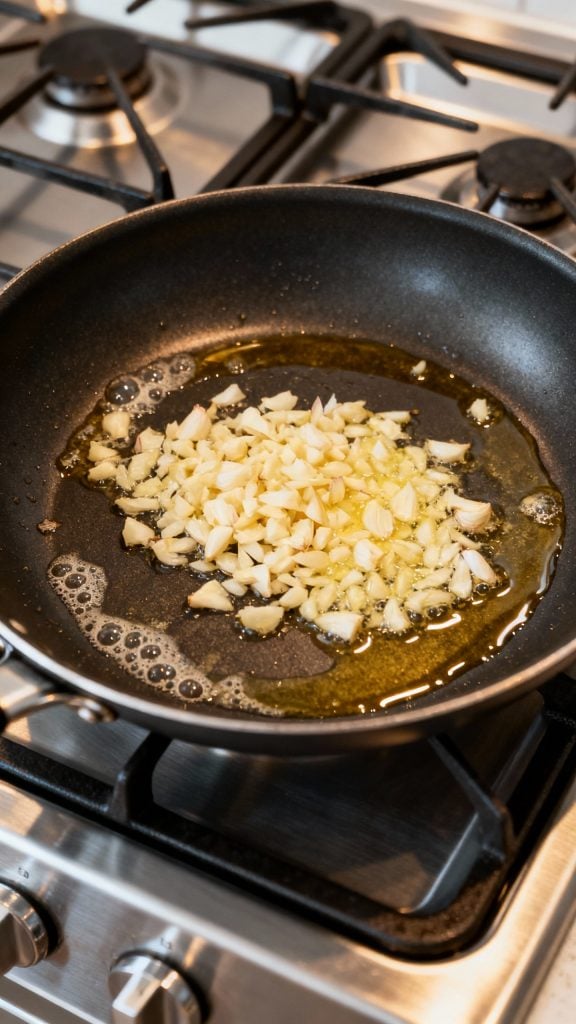
Step 1: Sauté Garlic in Butter and Oil
Heat 1 tablespoon of butter and 1 tablespoon of neutral oil in a large skillet or wok over high heat. Add 4 finely minced garlic cloves and sauté for about 30 seconds until fragrant but not browned.
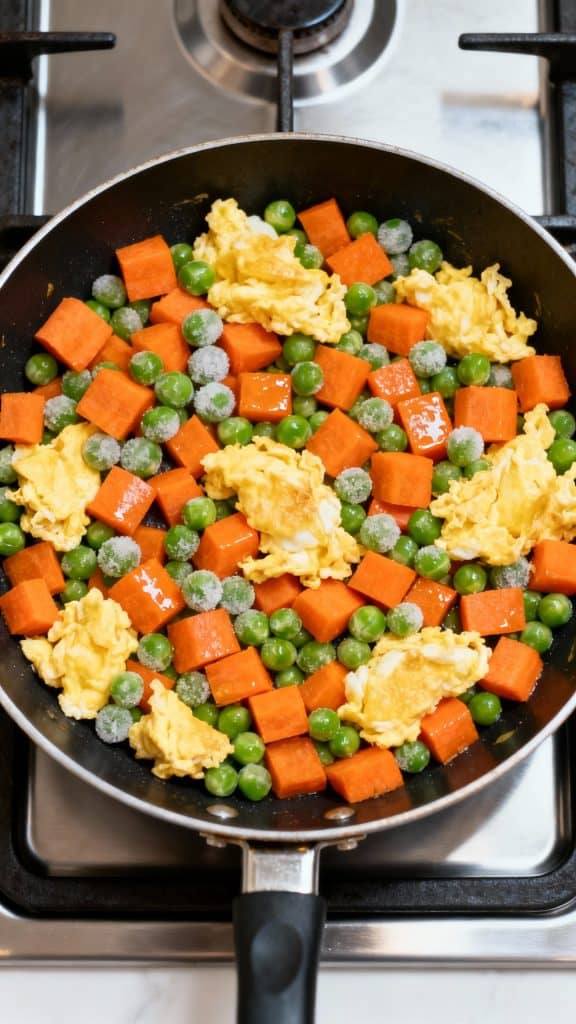
Step 2: Scramble the Eggs
Push the garlic to the side of the pan. Pour in 2 lightly beaten eggs. Let them sit for a few seconds, then gently scramble until just cooked. Mix them back in with the garlic.

Step 3: Add Carrots and Peas
Toss in 1/2 cup diced carrot and 1/3 cup frozen peas. Stir-fry for 2–3 minutes until the carrots are tender-crisp and peas are warmed through.
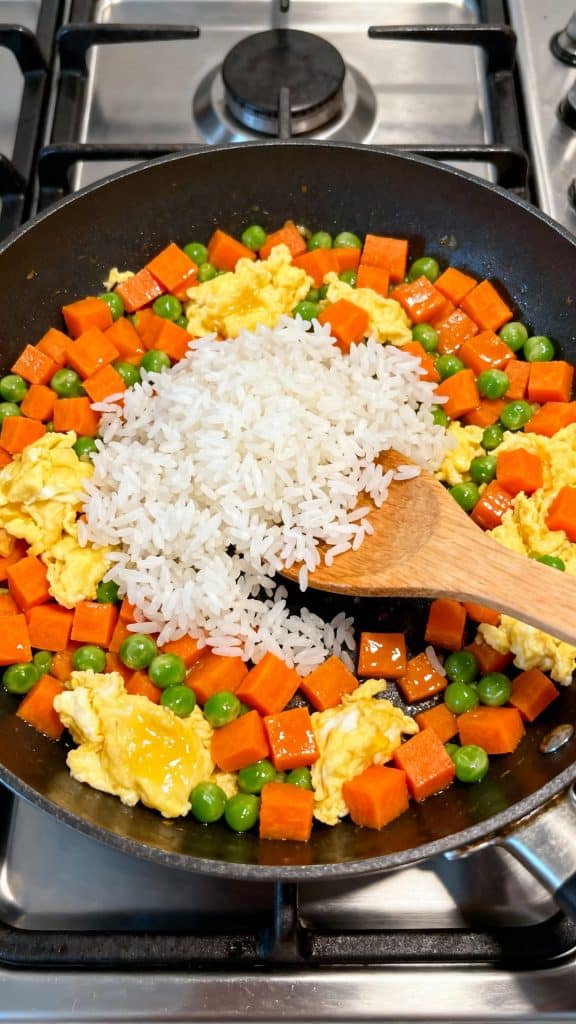
Step 4: Add the Rice
Add 4 cups of cold, cooked jasmine rice. Break up any clumps with your spatula and stir everything together for 2–3 minutes until rice is heated and evenly mixed.
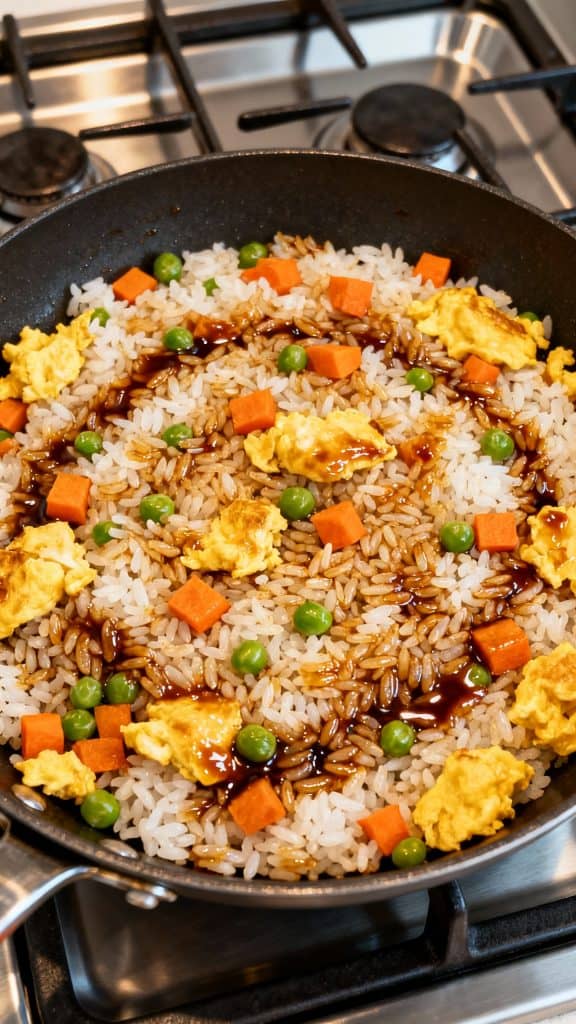
Step 5: Add Soy Sauce and Sesame Oil
Drizzle in 2 tablespoons of soy sauce and 1 teaspoon toasted sesame oil. Stir everything together so the rice gets evenly coated.
Step 6: Finish with Butter and Green Onions
Turn off the heat. Add the remaining 2 tablespoons of butter and 2 chopped green onions.
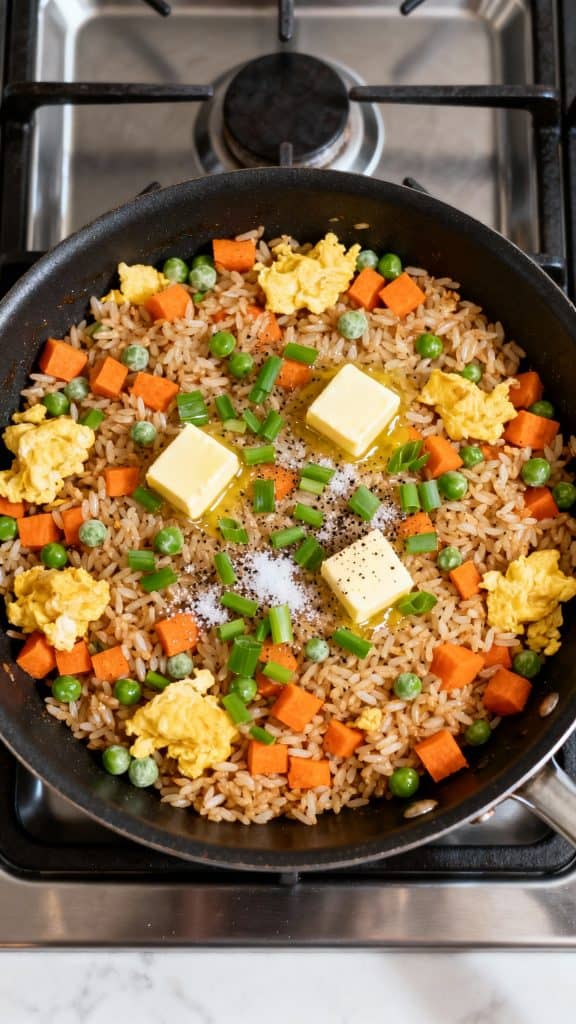
Step 7: Toss well
Stir through until butter melts and coats the rice. Add salt and pepper to taste.
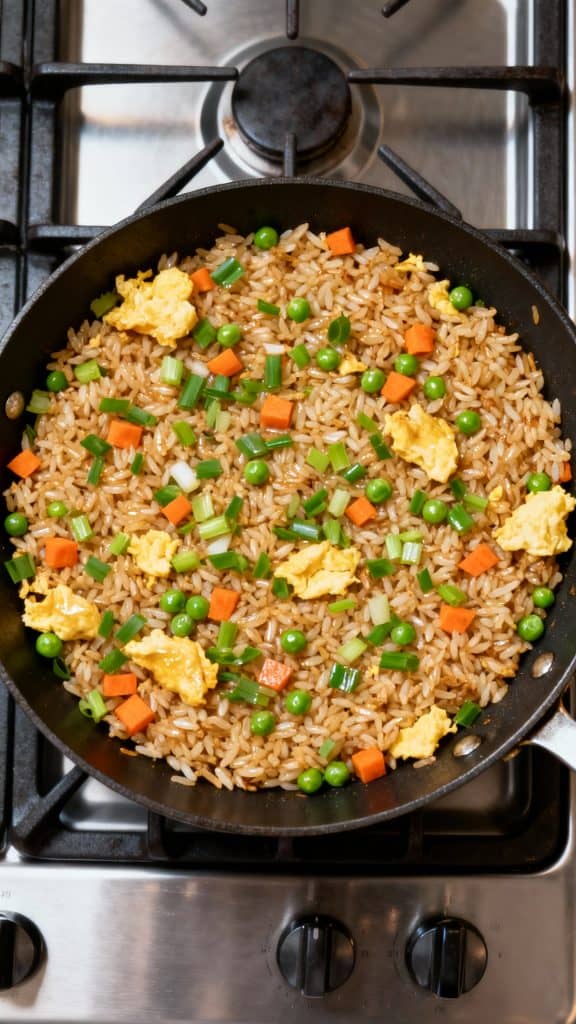
Step 8: Serve the Fried Rice
Spoon the hot hibachi garlic butter fried rice into a round bowl or plate. Make sure each serving has a good mix of rice, eggs, veggies, and green onions. Serve immediately while steaming hot, optionally with chopsticks on the side.

Leftovers & Storage
- Store leftovers in an airtight container in the fridge for up to 3 days
- Reheat in a pan with a splash of water or in the microwave with a damp paper towel
- You can also freeze it—spread it flat in a freezer bag and reheat from frozen in a hot skillet
Macros (per serving) – approx.
- Calories: 375
- Protein: 9g
- Carbs: 46g
- Fat: 18g
- Fiber: 2g
Why This Recipe Works (Quick Science)
Cold rice works better because it’s drier—meaning it fries instead of steaming. High heat cooks everything fast without overcooking. Garlic butter adds richness, and the soy sauce adds umami (that deep savory flavor) while the sesame oil gives that classic hibachi aroma.
Common Mistakes
- Using hot or fresh rice: It clumps and gets mushy. Use cold, day-old rice only.
- Not prepping first: The dish moves fast—everything should be chopped and ready.
- Overcooking the eggs: They’ll turn rubbery. Cook just until set.
- Too much soy sauce: It’ll turn salty quick—taste before adding more.
- Crowding the pan: Use a big skillet or wok so it fries, not steams.
What to Serve With
- Grilled chicken, shrimp, or steak
- Hibachi-style veggies (zucchini, onion, mushrooms)
- Yum Yum sauce or spicy mayo
- Miso soup
- A fresh cucumber salad
FAQ
Can I use brown rice?
Yes! Just make sure it’s fully cooked and chilled first.
Can I make this vegetarian?
Totally—just skip the eggs or use a plant-based alternative.
Can I double the recipe?
Yes, but you may need to cook in two batches so it fries properly.
What kind of pan should I use?
A wok is best, but any large nonstick or stainless-steel skillet works great.
Do I need to rinse the rice before cooking?
Yes! Rinsing removes extra starch and helps prevent mushy rice.
Final Thoughts
This Hibachi Garlic Butter Fried Rice is a total weeknight winner—fast, full of flavor, and straight-up comfort food. I hope you love it as much as I do. If you make it, let me know how it turned out in the comments below. I’d love to hear how you made it your own!