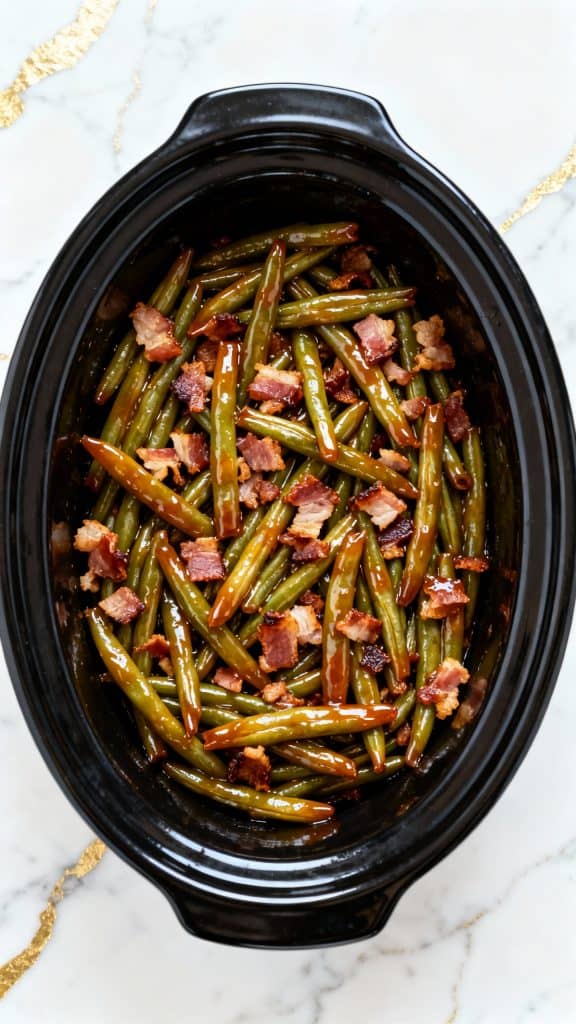
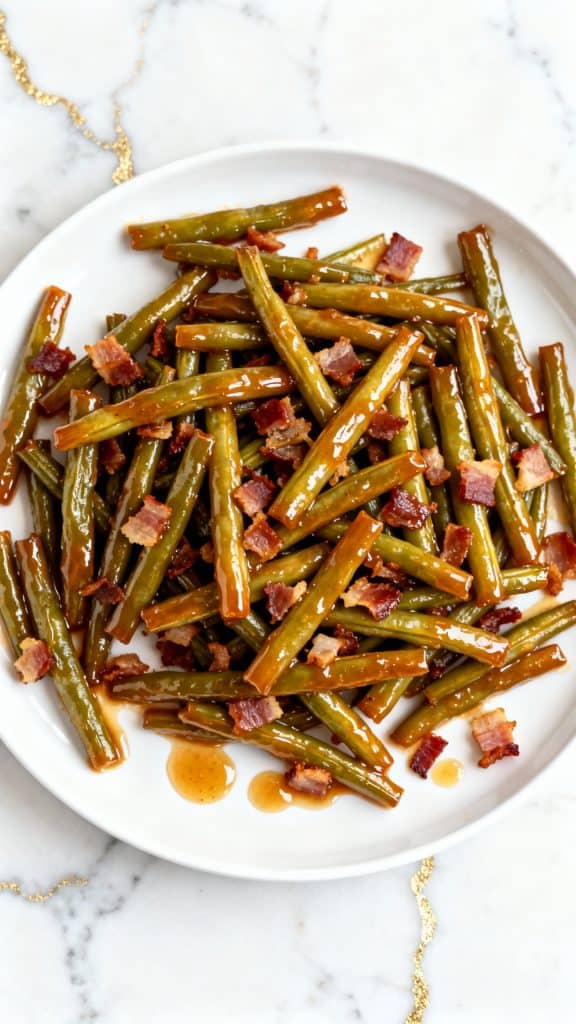
Crack Green Beans are one of those recipes that people taste once and immediately want the recipe.
It’s a little sweet, a little savory, with smoky bacon and a buttery glaze that coats every single green bean.
Super simple, packed with flavor, and perfect for holidays or a cozy Sunday dinner. You just throw it all in a crockpot and let the magic happen.

Why I Love This Recipe
The first time I made Crack Green Beans, I brought them to a potluck, and people were literally scraping the crockpot clean. It’s one of those recipes that turns a basic veggie into something that tastes like a full-on comfort dish.
- The bacon adds salty crunch
- The brown sugar and butter glaze is sweet and buttery
- It all comes together in the crockpot with no extra work
- It’s perfect for feeding a crowd
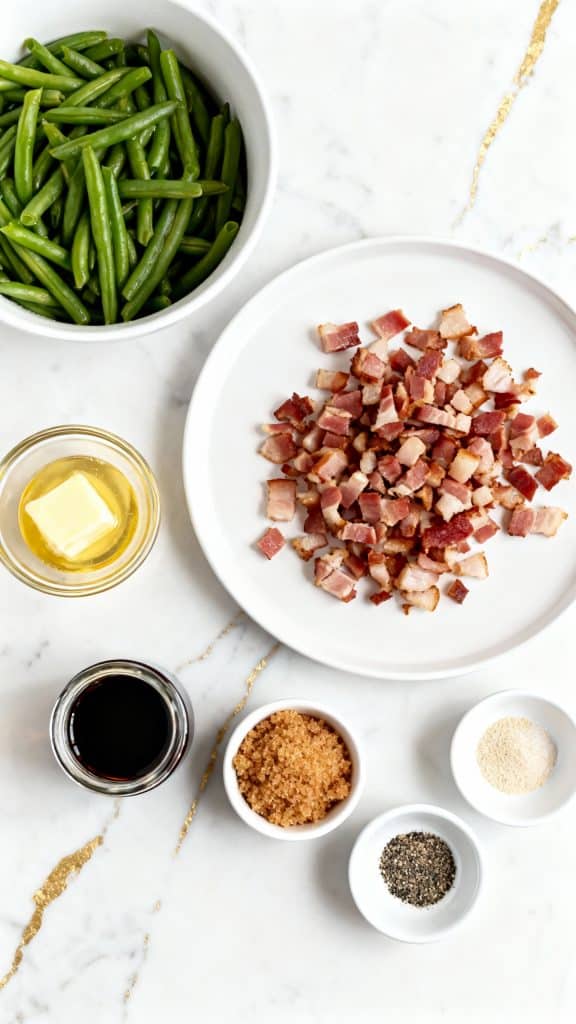
What You’ll Need
- 2 lbs canned green beans, drained
- 12 slices bacon, cooked and chopped
- ½ cup butter, melted
- ½ cup brown sugar
- 1 tbsp soy sauce
- 1 tsp garlic powder
- ½ tsp black pepper
Servings and Time
Servings: 6
Cook Time: 3 hours (in crockpot)
Prep Time: 10 minutes
Total Time: 3 hours 10 minutes
Macros (per serving – approx.)
- Calories: 280
- Protein: 9g
- Fat: 18g
- Carbs: 20g
- Fiber: 3g
- Sugar: 15g
Why This Recipe Works (Quick Science)
The fat from the bacon and butter carries all the flavors through the beans, helping the soy sauce, sugar, and spices stick to everything. The crockpot slow-cooks everything so the glaze thickens just enough without burning. Brown sugar caramelizes slightly and gives the green beans that glossy, sticky-sweet edge.
Common Mistakes
- Using fresh green beans: They don’t soak up the glaze like canned ones do. Stick with canned for best results.
- Not draining the green beans: Extra liquid waters down the glaze. Make sure they’re well drained.
- Adding uncooked bacon: It won’t crisp up in the crockpot. Always cook it first.
What to Serve With
- Mashed potatoes
- Roasted chicken or pork chops
- Mac and cheese
- Cornbread
- Classic stuffing (especially during holidays)
FAQ
Can I use frozen green beans?
Yes, but thaw and drain them well first or they’ll release too much water.
Is this recipe spicy?
Nope, it’s sweet and savory, but you can add red pepper flakes if you like a little heat.
Can I double the recipe?
Yes! Just make sure your crockpot is big enough.
Can I make this in the oven?
Yep, bake it at 350°F for about 25–30 minutes in a 9×13 dish.
Make Ahead Tips
- Cook and chop your bacon ahead of time and store in the fridge.
- You can mix the butter, brown sugar, soy sauce, garlic powder, and pepper together and store it covered for up to 2 days before adding to crockpot.
- The whole dish reheats really well in the microwave or oven, so you can fully cook it the day before and warm it up when ready to serve.
How to Make Crack Green Beans
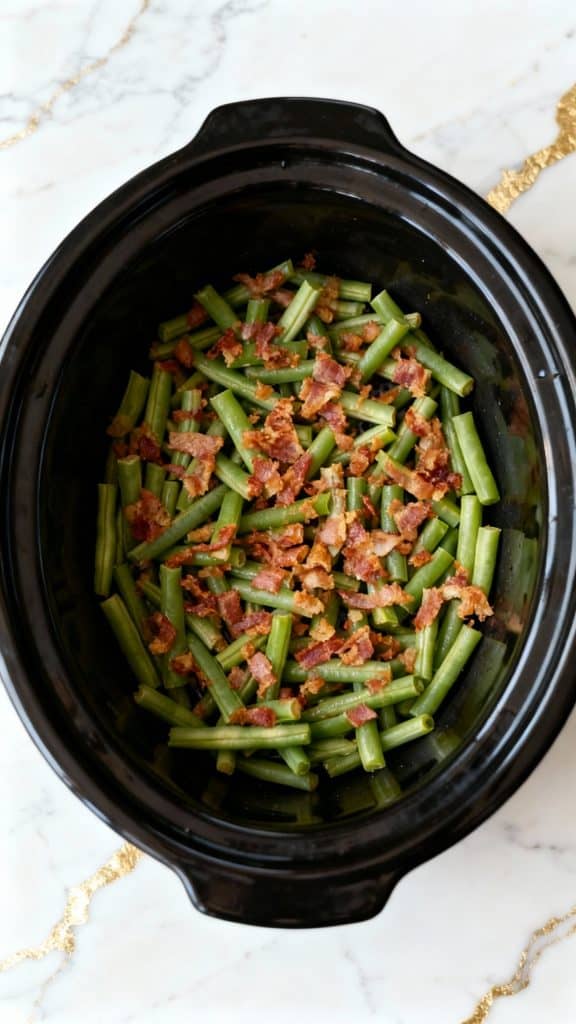
Step 1: Drain the Green Beans
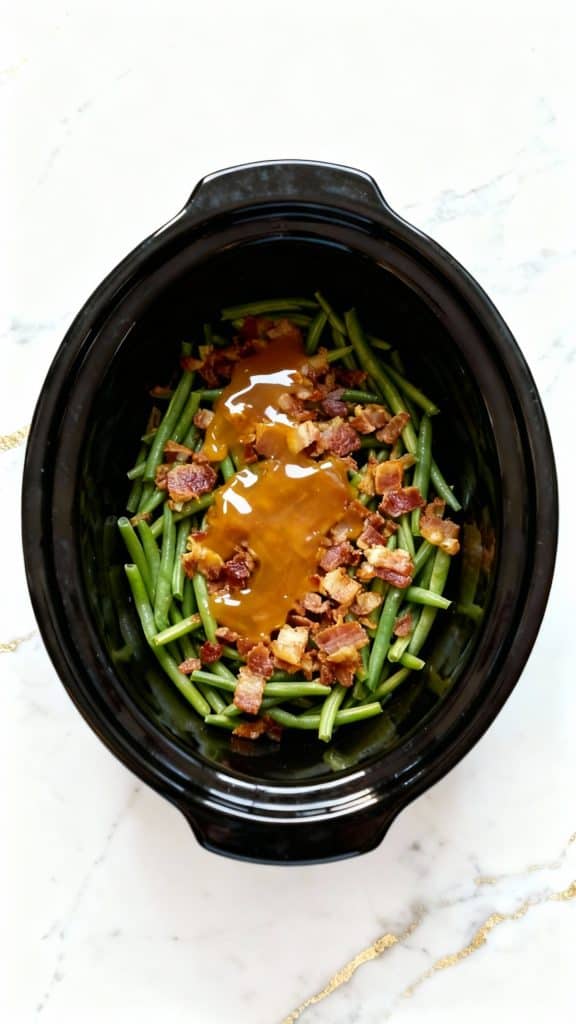
Drain 2 lbs of canned green beans and place them into the crockpot.

Step 2: Add the Cooked Bacon
Add 12 slices of cooked and chopped bacon evenly over the green beans in the crockpot.
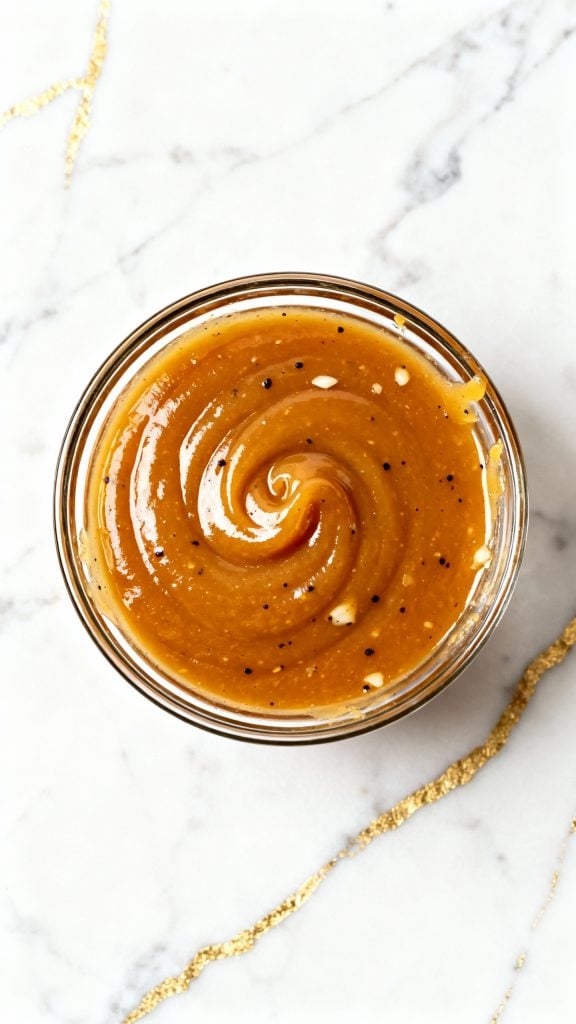
Step 3: Mix the Glaze
In a small bowl, stir together ½ cup melted butter, ½ cup brown sugar, 1 tbsp soy sauce, 1 tsp garlic powder, and ½ tsp black pepper until smooth.
Step 4: Pour Glaze Over Green Beans
Pour the glaze evenly over the green beans and bacon in the crockpot.
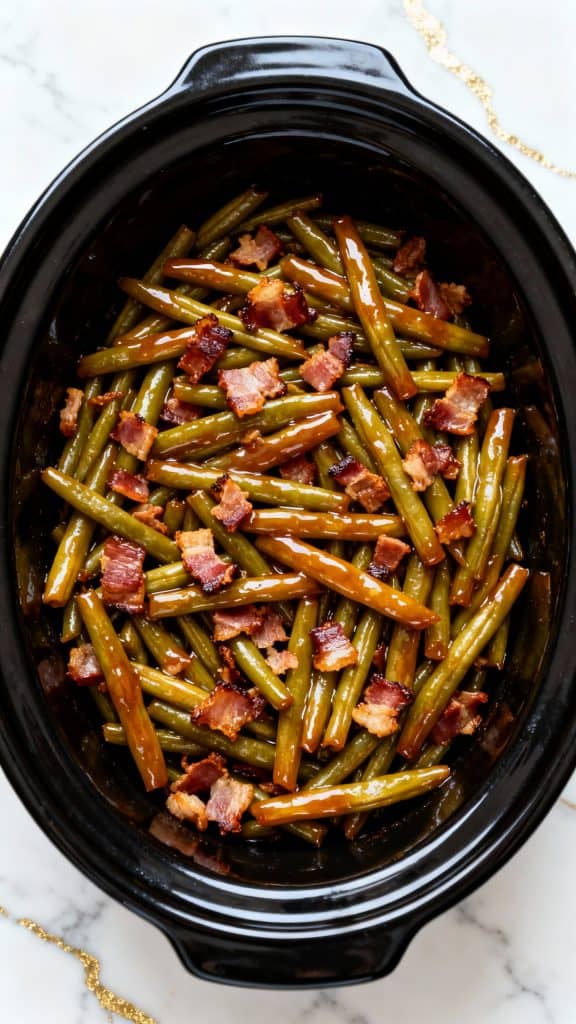
Step 5: Cook in Crockpot
Cover and cook on low for 3 hours. No need to stir—just let it simmer.
Leftovers and Storage
Let leftovers cool, then store in an airtight container in the fridge for up to 4 days. Reheat in the microwave or a small pot over low heat. You can also freeze it for up to 1 month—just thaw overnight in the fridge before reheating.
Final Thoughts
Crack Green Beans are the side dish that always disappears first. Sweet, salty, buttery, and totally addicting. If you try it, let me know how it turned out in the comments below—I’d love to hear what you served it with or how you made it your own!