
OREO Snowman Pops turn a crisp sandwich cookie into a sweet winter treat. A white candy shell gives each pop a snowy face, while black and orange icing adds the details. You only need a microwave and a little setting time. Make them for a Christmas dessert table, a cookie swap, or a simple homemade gift.

Why I Love This Recipe
These pops bring a cheerful touch to a holiday spread without mixing dough or turning on the oven. The cookie stays crisp inside, and the familiar creme center balances the firm candy shell. Small, uneven smiles give each snowman its own charm.
- No baking: Start with ready-made sandwich cookies.
- Simple decorating: Dots and a short orange line make the whole face.
- Easy to plan ahead: The coating protects the cookies once it sets.
- Small batch: A dozen pops fits on a standard baking sheet.

What You’ll Need
- Servings: 12, one pop per serving
- Prep Time: 30 minutes
- Cook Time: 2 minutes, for melting
- Setting Time: 60 minutes
- Total Time: 1 hour 32 minutes
- Pan: Parchment-lined rimmed metal baking sheet
Ingredients
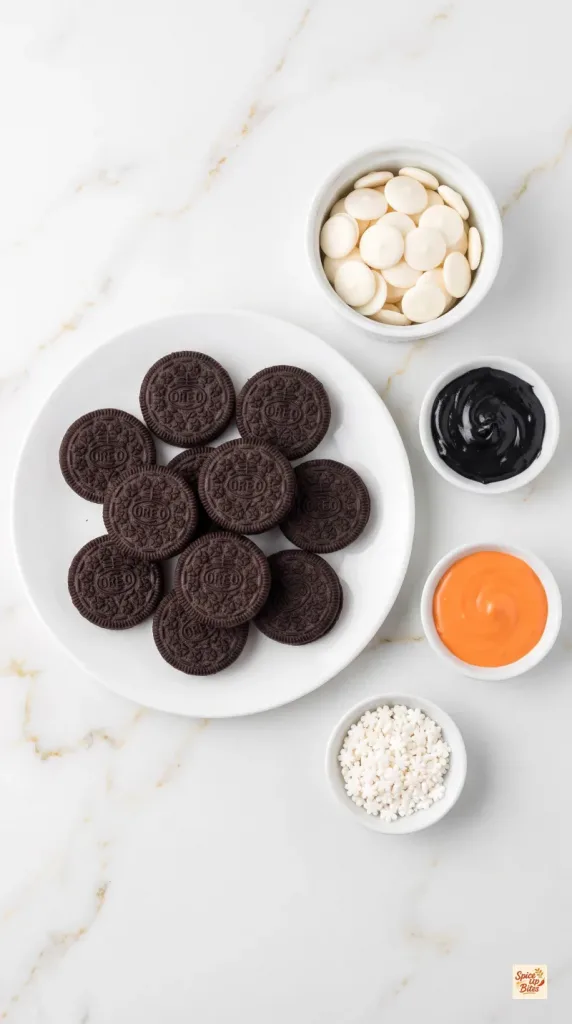
- 12 Double Stuf OREO sandwich cookies, intact
- 10 ounces white vanilla candy melts, divided
- 1 tablespoon black cookie decorating icing that dries firm
- 1 teaspoon orange cookie decorating icing that dries firm
- 1 teaspoon white edible snowflake sprinkles
Use slim paper lollipop sticks. Thick sticks can split the cookies. Candy melts are a confectionery coating; they do not need chocolate tempering. Choose cookie icing rather than a soft writing gel if you plan to wrap the pops.
Tools You Need
- Microwave
- Small microwave-safe bowl, completely dry
- Spoon and small flexible spatula
- 12 slim paper lollipop sticks
- Rimmed metal baking sheet and parchment paper
- Small piping bags with fine openings
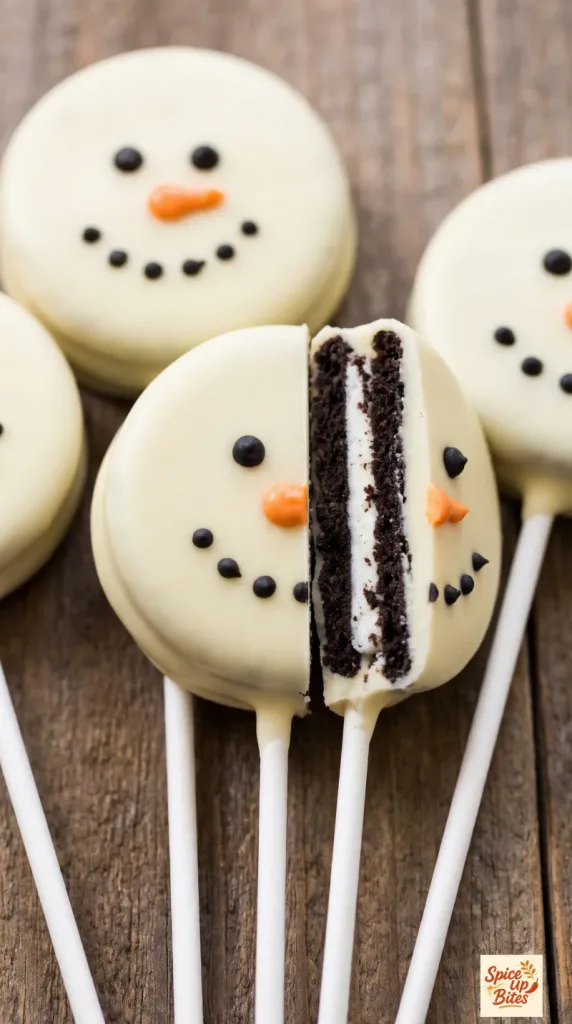
- Small sharp knife, optional for showing the inside
How to Make OREO Snowman Pops
Work in stages so the cookie joints have time to firm up before dipping.
Step 1: Prepare the Cookies
Line a rimmed metal baking sheet with parchment paper.
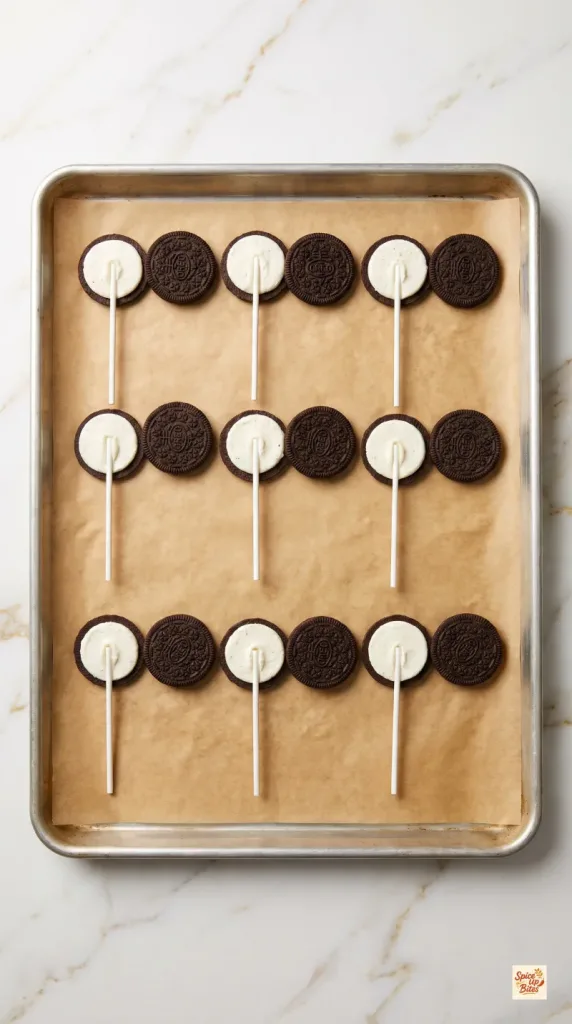
Carefully twist apart 12 Double Stuf OREO sandwich cookies, keeping the creme on the lower wafers.
Press a slim paper lollipop stick gently into each creme center to make a shallow channel. Keep the stick inside the cookie outline at the top, with a handle extending from the bottom.
Step 2: Secure the Sticks
Place 2 ounces of the white vanilla candy melts in a completely dry microwave-safe bowl. Heat for 30 seconds, stir, then use 15-second bursts as needed until smooth. Follow the package instructions if they differ.
Dip the upper end of each of the 12 lollipop sticks in a little melted coating. Set it in the creme channel and spread a small dab over the joint.
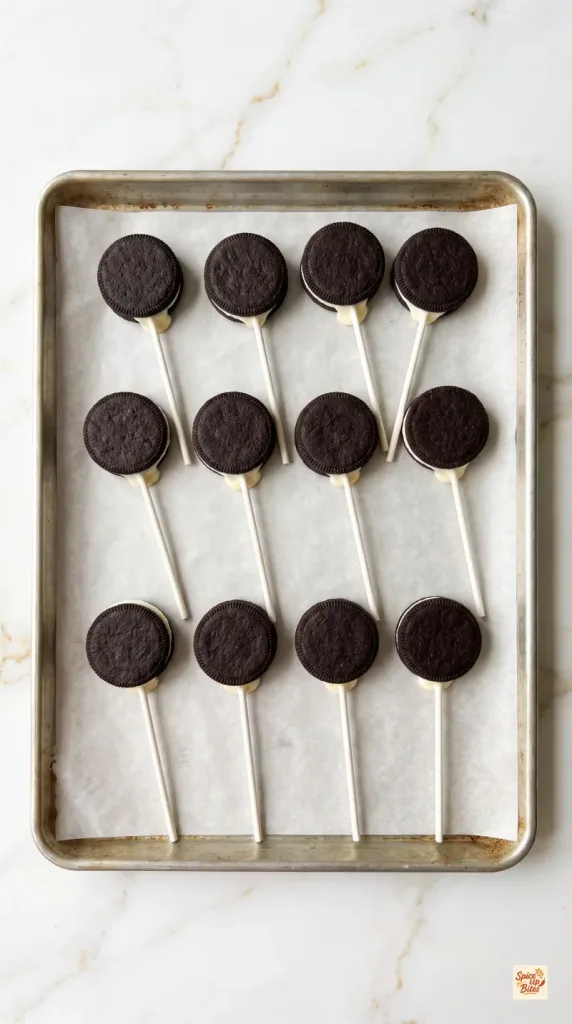
Replace each top wafer and press gently. Keep the cookies flat on the parchment-lined rimmed metal baking sheet for 10 minutes, or until the joints are firm. Reserve any coating left in the bowl.
Step 3: Coat the Cookies
Add the remaining 8 ounces white vanilla candy melts to the same bowl. Microwave in 15-second bursts, stirring well each time, until smooth. Let the coating stand briefly if it feels hot.
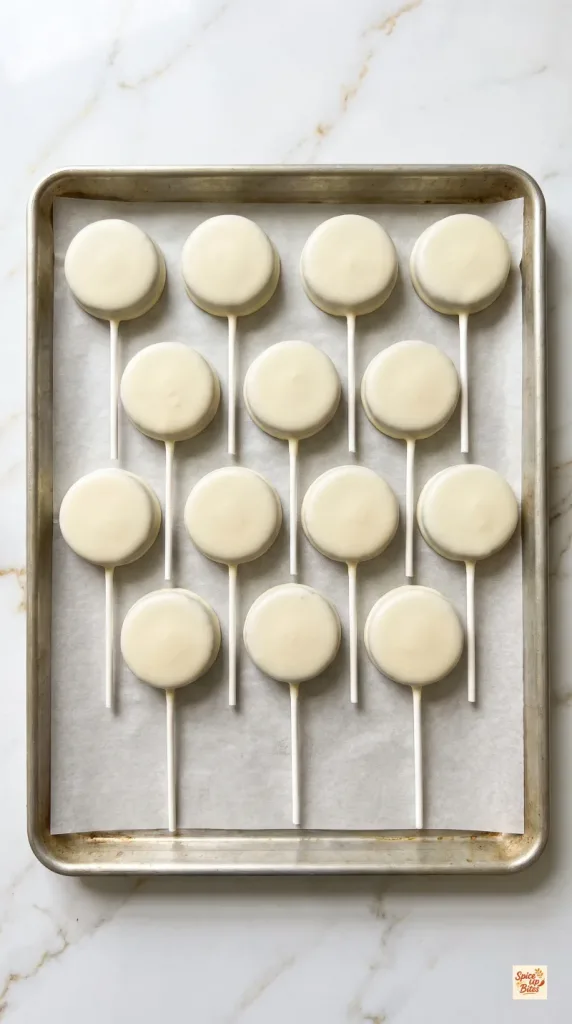
Working with the 12 secured cookie pops, spoon coating over the front, back, and edges while holding each pop over the bowl. Let excess drip back without shaking the stick hard.
Set each pop face up on the same parchment-lined rimmed metal baking sheet, leaving space between them. Let stand for 20 minutes, or until the shell is firm and no longer tacky.
Step 4: Add the Snowman Faces
Put 1 tablespoon black cookie decorating icing and 1 teaspoon orange cookie decorating icing into separate small piping bags with fine openings.
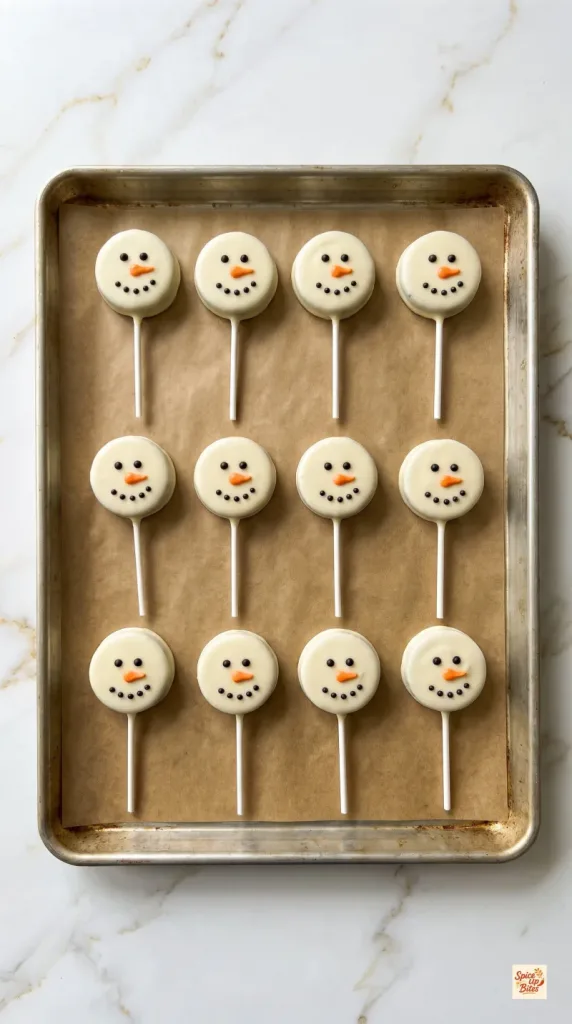
Across the 12 coated pops, pipe black dots for eyes and a curved dotted smile. Add a small tapered orange nose to each face. Keep the icing thin so it can dry evenly.
Let the decorated pops rest flat on the same parchment-lined rimmed metal baking sheet for 30 minutes, or until the icing is dry to a light touch. Some brands need longer; follow the icing label before wrapping.
Step 5: Set Out and Serve
Once the coating and icing are firm, lift the 12 OREO Snowman Pops from the parchment by their sticks.
Arrange a serving portion with the handles easy to reach. Scatter 1 teaspoon white edible snowflake sprinkles around the full batch, dividing them among any smaller displays. Serve the pops on their own.
If you want to show the center, support a pop flat and use a small sharp knife to gently cut through one side. Leave its stick and the rest of the cookie intact.

Why This Recipe Works (Quick Science)
The first small dab of candy coating acts as edible glue. Once firm, it holds the stick between the cookie wafers so the joint can bear the added coating. Spooning the coating over the cookie puts less strain on that joint than swirling it through a deep bowl.
Candy melts contain fats designed to firm up after melting and cooling. A dry bowl keeps stray water from turning the smooth coating thick and grainy. Letting the shell set before adding icing also keeps the black and orange details from sliding.
Common Mistakes to Avoid
- Forcing the stick: Make a shallow channel in the creme first. Replace any cracked cookie before coating.
- Skipping the first set: A loose joint may slip as soon as it meets warm coating.
- Overheating the melts: Stir between short bursts. Residual heat can finish melting the last small lumps.
- Adding water: Water can seize the coating. Keep the bowl, spoon, and cookies dry.
- Decorating a soft shell: Wait until the surface feels firm and dry.
- Wrapping too soon: Even firm coating can hide soft icing. Check both before bagging.
Pro Tips
Use a spoon to cover any bare patch near the stick. Let the extra coating drain before returning the pop to the sheet, so you get a neat edge rather than a thick puddle.
If the coating thickens as you work, warm it briefly and stir. Avoid adding liquid food coloring to candy melts. Colored cookie icing gives you the face details without changing the coating.
Keep the noses small and the smiles simple. You can practice a few dots on spare parchment before decorating the cookies.
Leftovers and Storage
Store the fully set pops in an airtight container in a cool, dry place for up to 1 week. Keep them away from sunlight and heat. If layering them, separate the layers with parchment and avoid pressing on the faces.
For gifts, slip each dry pop into a food-safe treat bag. In a warm room, keep the container in a cooler spot until serving. Refrigeration can cause condensation when the pops return to room temperature, so let a chilled container warm while still closed before opening it.
Macros Information
Estimated per pop, including the full listed coating and decorations. Actual values vary by brand and by how much coating stays in the bowl.
- Calories: 205
- Protein: 1 g
- Carbohydrates: 29 g
- Fat: 10 g
- Saturated Fat: 7 g
- Fiber: 0.5 g
- Sugar: 23 g
- Sodium: 65 mg
Frequently Asked Questions (FAQ)
Q: Can I use regular OREO cookies?
A: Yes, but the thinner creme layer leaves less room for the stick. Use a slim stick and a gentle touch.
Q: Do I crush the cookies?
A: No. These pops use whole sandwich cookies with their creme filling inside.
Q: Can I use white chocolate instead of candy melts?
A: Yes, though real white chocolate may need tempering for a firm room-temperature finish. Candy melts are the easier choice for this method.
Q: Why does my cookie fall off the stick?
A: The wafer may be cracked, the joint may still be soft, or the coating may be too hot. Let the glued joint set completely and handle the pop gently.
Q: Can I use writing gel for the face?
A: It works for pops served right away, but often stays tacky. Firm-drying cookie icing is better for stacking or wrapping.
Q: How far ahead can I make them?
A: Make them up to 3 days ahead for the freshest texture, then keep them sealed in a cool, dry place.
Q: Do I need a cake pop stand?
A: No. Let them set flat on parchment. You can serve them flat with their sticks spread out and easy to pick up.
Q: Can I double the recipe?
A: Yes. Double the ingredients and use more parchment-lined baking sheets. Melt the coating in manageable portions so it stays easy to stir.
Final Thoughts
OREO Snowman Pops bring crisp cookies, creamy centers, and cheerful little faces to the Christmas table. Give the joints time to set, keep the coating smooth, and enjoy adding those small smiles. Leave a comment with your favorite way to decorate them. Happy cooking!
1 thought on “OREO Snowman Pops”
Comments are closed.