
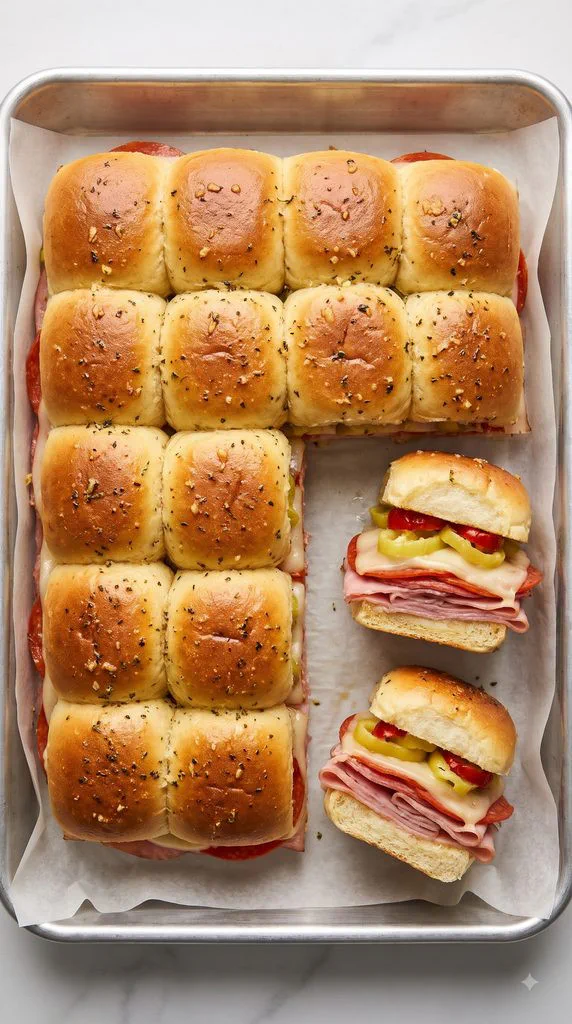
Hot Italian Sub Sliders bring deli-counter flavor to a pan of soft, buttery rolls. Ham, salami and pepperoni make a savory filling, while provolone melts around the layers. Pickled peppers add a bright, tangy kick. A quick garlic-herb butter turns the tops golden and makes these little sandwiches easy to share.
Why I Love This Recipe
There is a lot to like about a sandwich you can build as one batch. The sweet rolls balance the salty meats, and the peppers keep each bite lively. You get a toasted top, a soft middle and plenty of melted cheese without making separate sandwiches from scratch.
- Big sub flavor: Three deli meats give the filling a rich, savory bite.
- Easy assembly: Slice the connected rolls once, then layer and bake.
- A little heat: Pickled peppers add tang without a heavy sauce inside.
- Flexible portions: Serve a slider as an appetizer or a few with a side for dinner.
What You’ll Need
- Servings: 12 sliders; nutrition is per slider, including an equal share of marinara
- Prep Time: 15 minutes
- Cook Time: 30 minutes
- Rest Time: 5 minutes
- Total Time: 50 minutes
- Oven Temperature: 350°F (175°C), conventional oven
- Pan Size: 9×13-inch rimmed aluminum baking pan
Ingredients
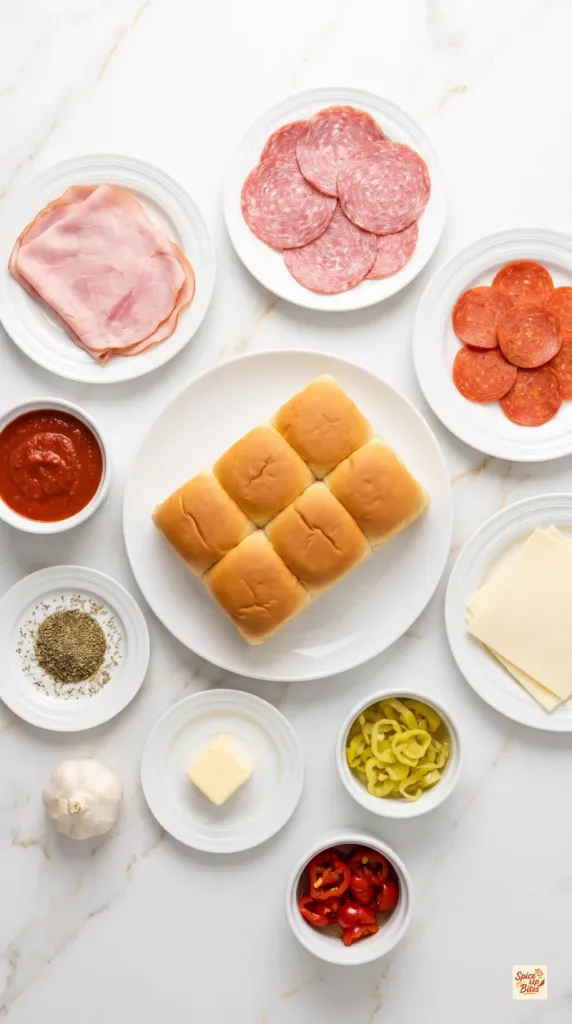
- 1 package (12 count, about 12 ounces) connected Hawaiian sweet rolls
- 6 ounces fully cooked deli ham, thinly sliced
- 5 ounces salami, thinly sliced
- 5 ounces pepperoni, thinly sliced
- 6 ounces provolone, in 12 thin square slices sized to the individual rolls
- 1/3 cup sliced pepperoncini, measured after draining and patted dry
- 1/3 cup sliced pickled hot cherry peppers, measured after draining and patted dry
- 1/4 cup salted butter, melted
- 1 teaspoon dried Italian seasoning
- 2 garlic cloves, finely crushed
- 1 cup prepared marinara sauce, for serving
Choose thin, square deli-cut provolone slices that total 6 ounces. Each roll gets its own slice; a thinner slice keeps the cheese amount balanced.
Tools You Need
- 9×13-inch rectangular rimmed aluminum baking pan, with a rolled rim and no handles
- Parchment paper and aluminum foil
- Serrated bread knife and wooden cutting board
- Small microwave-safe glass bowl
- Pastry brush
- Measuring cups and spoons
- Instant-read thermometer
- Microwave-safe bowl for the marinara
How to Make Hot Italian Sub Sliders
Keep the rolls connected while you build the layers, then cut individual sandwiches after baking.
Step 1: Prepare the Bread and Pan
Heat the oven to 350°F (175°C) with a rack in the middle.
Line a 9×13-inch rimmed aluminum baking pan with parchment, letting the paper extend up the sides. No greasing is needed.
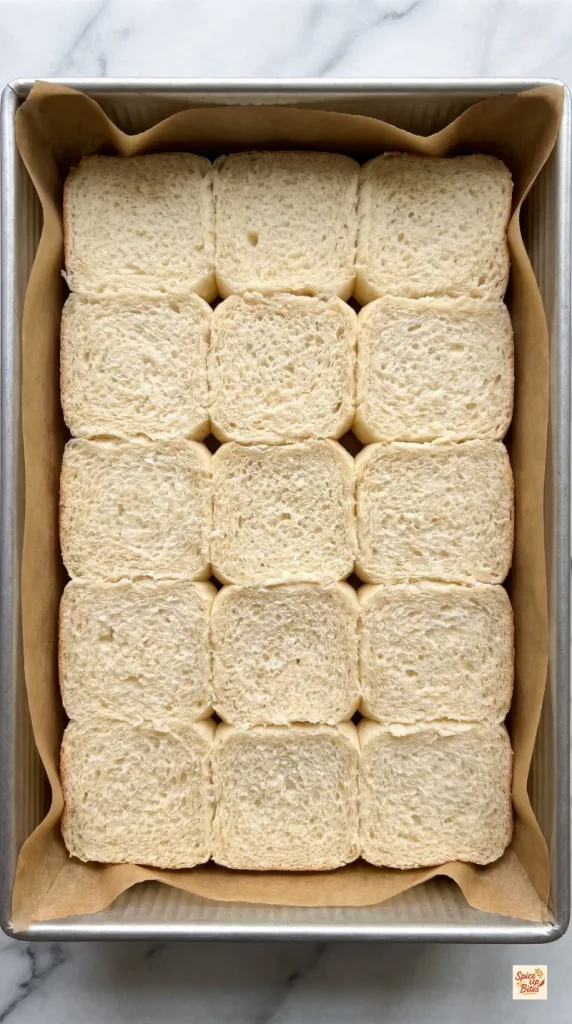
Use a serrated knife to split 1 package of 12 connected Hawaiian rolls horizontally through the middle, making a bottom slab and a matching top slab.
Set the bottom slab cut-side up in the pan. Reserve the top slab.
Step 2: Layer the Filling
Spread 6 ounces thinly sliced fully cooked ham evenly over the roll bottoms, folding the slices gently as needed.
Add 5 ounces sliced salami, then 5 ounces sliced pepperoni, keeping the layers even from edge to edge.
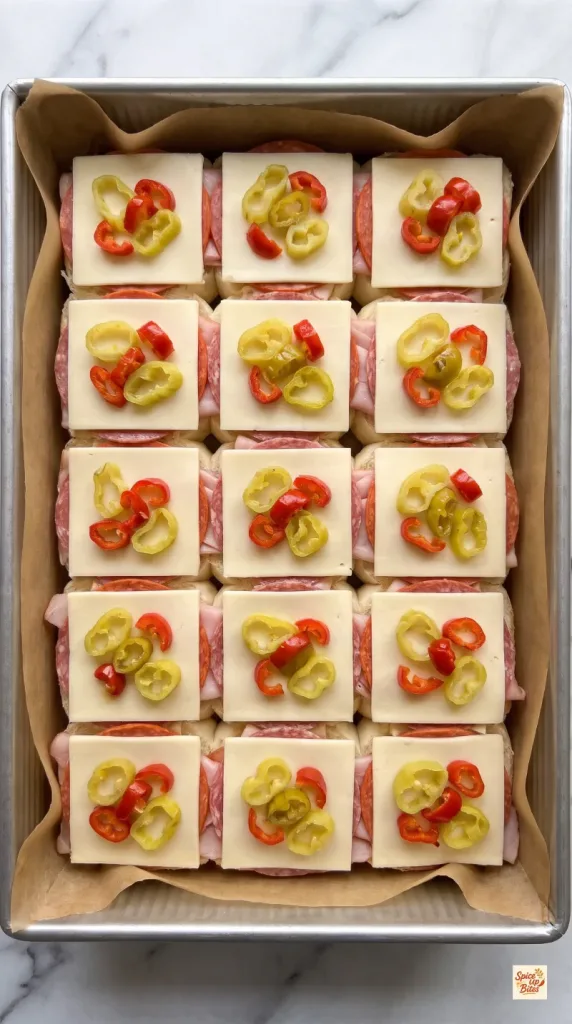
Place 12 thin square provolone slices totaling 6 ounces over the meats, with one separate slice on each roll footprint. Keep the slices side by side without overlap.
Distribute 1/3 cup drained sliced pepperoncini and 1/3 cup drained sliced pickled hot cherry peppers evenly over the cheese. Give every slider some of each pepper.
Step 3: Close and Butter the Sliders
Replace the reserved top slab of the 12 rolls, lining it up with the bottoms.
Stir 1/4 cup melted salted butter, 1 teaspoon dried Italian seasoning and 2 finely crushed garlic cloves together in a small bowl.
Brush all of the garlic butter evenly over every bun top and into the shallow seams. Stir the mixture as you brush so the herbs do not collect on just a few rolls.
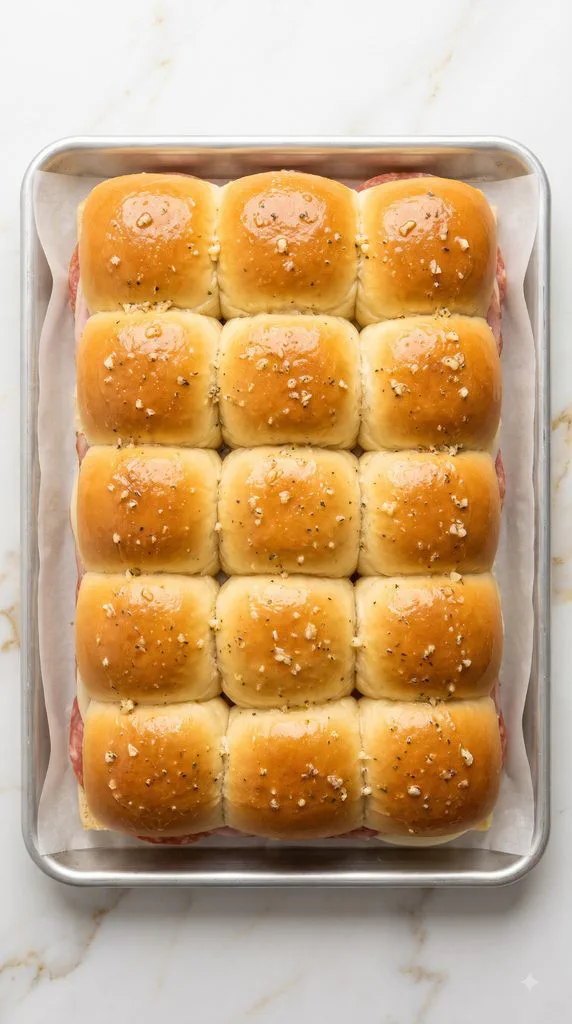
Step 4: Bake the Sliders
Tent the pan loosely with foil so it does not stick to the buttered tops.
Bake at 350°F (175°C) for 20 minutes. Remove the foil, then bake for 10 minutes more, until the tops are lightly golden and the cheese is fully melted.
Check the center filling with an instant-read thermometer. Aim for 165°F (74°C) so the deli meats are heated through, especially when serving anyone at higher risk from foodborne illness. If needed, loosely cover again and bake a little longer; avoid overbrowning the bottoms.
Set the uncovered pan on a heat-safe surface. The bun tops should settle gently against the filling, with a buttery sheen and small herb flecks.
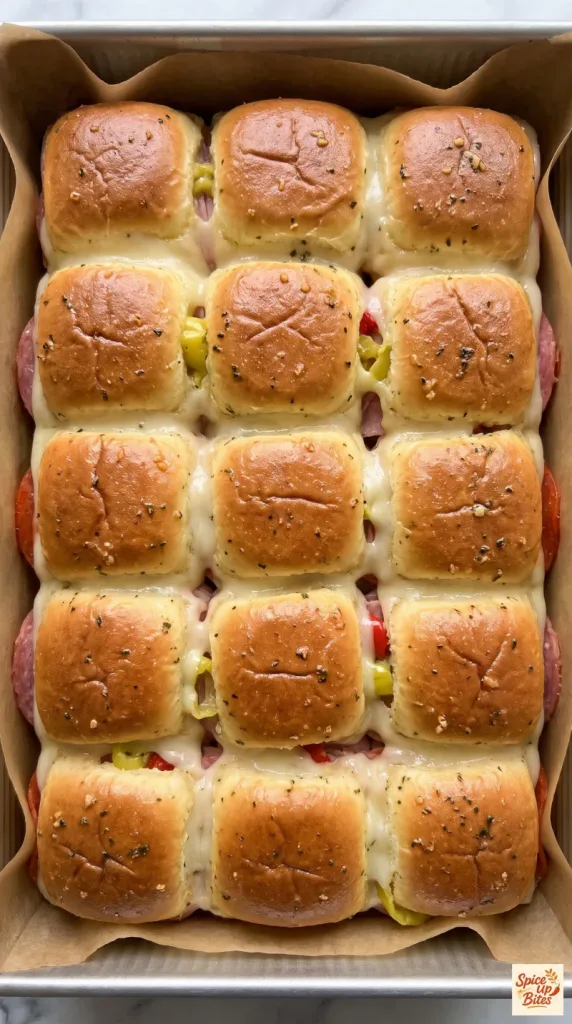
Step 5: Rest, Slice and Serve
Let the sliders rest for 5 minutes, then cut through the bread and filling along the roll seams to make 12 individual sliders.
Warm 1 cup prepared marinara sauce in a loosely covered microwave-safe bowl, stirring after 30-second intervals until warmed through.
Serve the sliders with the marinara on the side for dipping. For a simple meal, add an optional green salad or crunchy vinegar slaw.
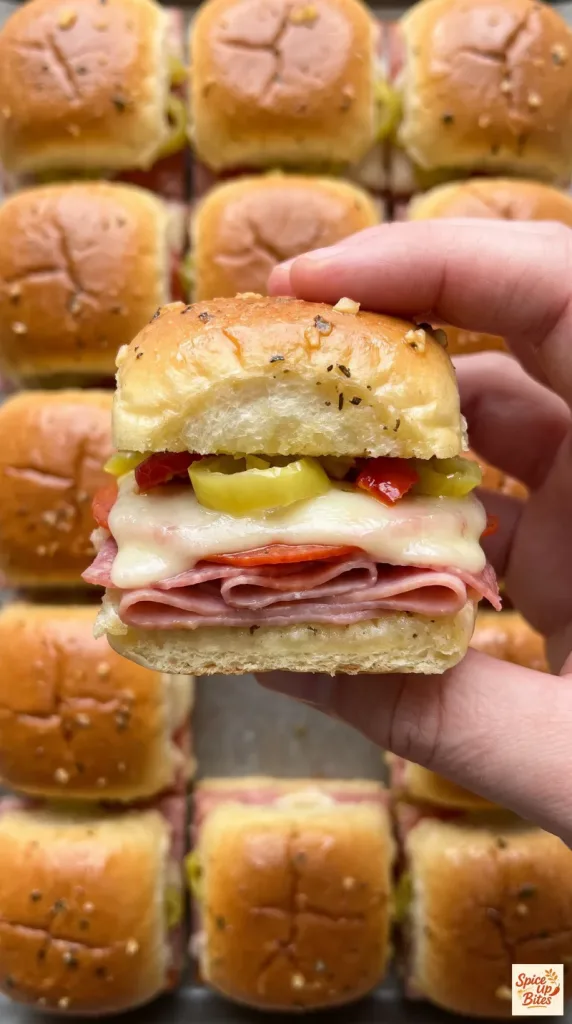
Why This Recipe Works (Quick Science)
Covering the pan first holds moisture around the sandwiches. That helps the center heat and the provolone soften before the bread gets too dark. Uncovering near the end lets excess moisture escape and gives the tops a light toast.
The garlic butter spreads flavor over the bread and helps the herbs stick. Draining the peppers limits the extra liquid that could soak the bottom rolls. A short rest also lets the melted cheese settle, making cleaner portions easier to cut.
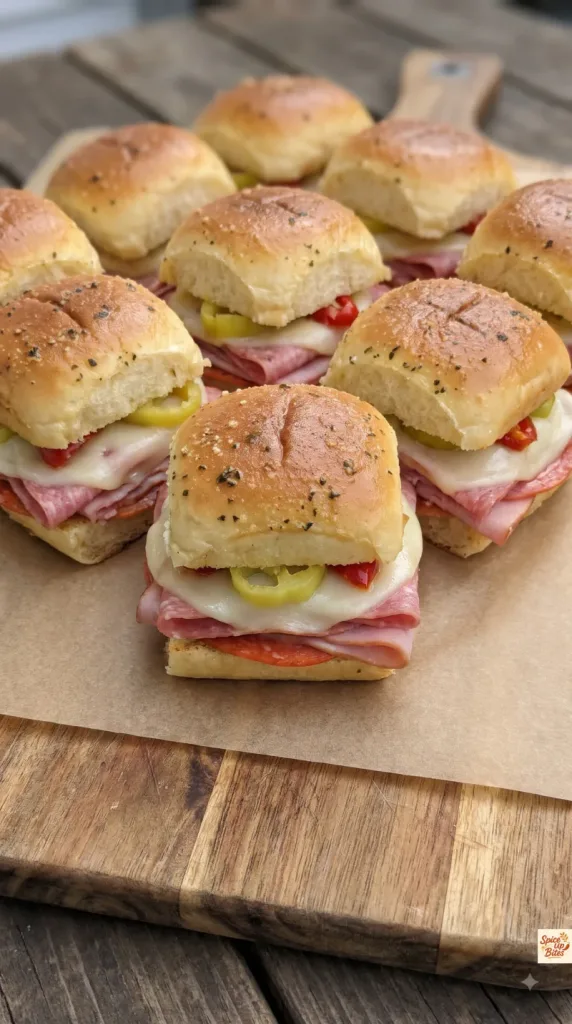
Common Mistakes to Avoid
- Using wet peppers: Drain, measure and pat them dry before assembly. Extra brine can make the bread soggy.
- Piling filling in the center: Spread each meat layer evenly so the outside sliders get the same flavor.
- Using thick cheese slabs: Thin slices melt more evenly and keep the sandwiches easy to bite.
- Baking uncovered the whole time: The tops may darken before the middle heats through.
- Pulling the rolls apart too soon: Cut through the meat layers after baking instead of tearing the sandwiches apart.
Pro Tips
- Brush butter over every top, including the outside rolls. Stir up the garlic and herbs between brushfuls.
- Use the middle oven rack. A low rack can brown the sweet roll bottoms too fast.
- Check the center slider for melted cheese, rather than judging only by the outside edges.
- For a milder batch, replace the hot cherry peppers with the same amount of drained roasted red peppers. Keep the main method the same.
What to Serve With Hot Italian Sub Sliders
The warm marinara makes an easy dip and adds tomato flavor without soaking the bread during baking. Set it beside the serving board so people can take as much as they like.
For dinner, pair two or three sliders with a green salad or crunchy vinegar slaw. Roasted broccoli is another simple option. For an appetizer spread, serve the sliders in small batches so the bread stays fresh.
Make-Ahead Tips
Assemble the bread, meats, cheese and peppers up to 1 day ahead. Cover the pan tightly and refrigerate promptly. Add the freshly mixed garlic butter just before baking.
A cold batch may need 5–10 extra minutes under foil. Use the center temperature and melted cheese as your guide, then uncover to lightly toast the tops.
Leftovers and Storage
Refrigerate leftover sliders in a covered container within 2 hours of serving. Keep for 3–4 days, with the marinara stored separately.
Reheat covered in a 325°F (165°C) oven until the center reaches 165°F (74°C), usually 15–20 minutes for a few chilled sliders. Uncover briefly at the end if the tops need refreshing.
For longer storage, wrap cooled sliders tightly and freeze for up to 2 months for best quality. Thaw in the refrigerator overnight before reheating.
Macros Information
Estimated per slider, including one-twelfth of the marinara. Brands and slice thickness change these values.
- Calories: 300 kcal
- Protein: 14 g
- Carbohydrates: 24 g
- Fat: 17 g
- Saturated Fat: 8 g
- Fiber: 1 g
- Sugar: 8 g
- Sodium: 1,000 mg
Frequently Asked Questions (FAQ)
Q: Can I use plain dinner rolls?
A: Yes. Use 12 connected slider-size dinner rolls with a similar total weight. The filling will taste a little less sweet.
Q: How spicy are these sliders?
A: They have a noticeable kick from the cherry peppers and pepperoncini. Choose mild pickled peppers or use the roasted red pepper swap for a gentler version.
Q: Do I need to cook the meats first?
A: No. Use ready-to-eat, fully cooked deli ham, salami and pepperoni. The oven heats them through inside the sandwiches.
Q: Why use a separate cheese slice on every roll?
A: It gives each slider an even share of cheese and makes the assembly easier to portion. Use thin slices totaling 6 ounces for the whole batch.
Q: Can I use round provolone slices?
A: Thin square deli-cut slices fit this assembly best. Ask the deli to slice a square block, or choose square sandwich provolone with the same total weight.
Q: Why are my bottom rolls soggy?
A: Wet peppers and too much trapped moisture are common causes. Pat the peppers dry and finish baking uncovered. Keep the marinara outside the sandwiches until serving.
Q: Can I double the recipe?
A: Yes. Use two matching pans so the rolls stay in a single layer. Rotate the pans if they brown unevenly and check the center of each batch.
Q: Can I skip the marinara?
A: Yes. The buttery rolls, melted cheese and tangy peppers make a complete sandwich on their own. Nutrition will be slightly lower without the dip.
Q: Can I reheat sliders in the microwave?
A: You can, but the bread will be softer. Heat in short bursts until the center reaches 165°F (74°C). The oven gives a better toasted top.
Final Thoughts
Hot Italian Sub Sliders make a generous little sandwich with savory layers, soft melted cheese and bright pickled peppers. Keep the filling even, drain the peppers well and let the oven do the rest. Leave a comment with your favorite way to serve them.
Happy cooking!