This butternut squash mac and cheese is everything you love about classic mac, but just a little lighter, a little sweeter, and packed with fall flavor.
The squash blends into the sauce to make it creamy and velvety, and the cheese gives it that perfect gooey finish.
It’s cozy, cheesy, and so satisfying — you won’t even miss the usual heavy cream.

Why I Love This Recipe
I started making this mac and cheese when I had leftover roasted squash in the fridge, and now I honestly prefer it this way. It’s got that classic comfort food vibe, but with more depth and flavor. Plus, it’s a great way to sneak in a veggie and still keep it super cheesy.
- The butternut squash makes the sauce extra creamy and golden
- It reheats beautifully — great for leftovers
- You can bake it with breadcrumbs or keep it stovetop-style
- You still get all the cheesy goodness, just a little lighter
- It’s a great way to use up fresh or frozen squash

What You’ll Need
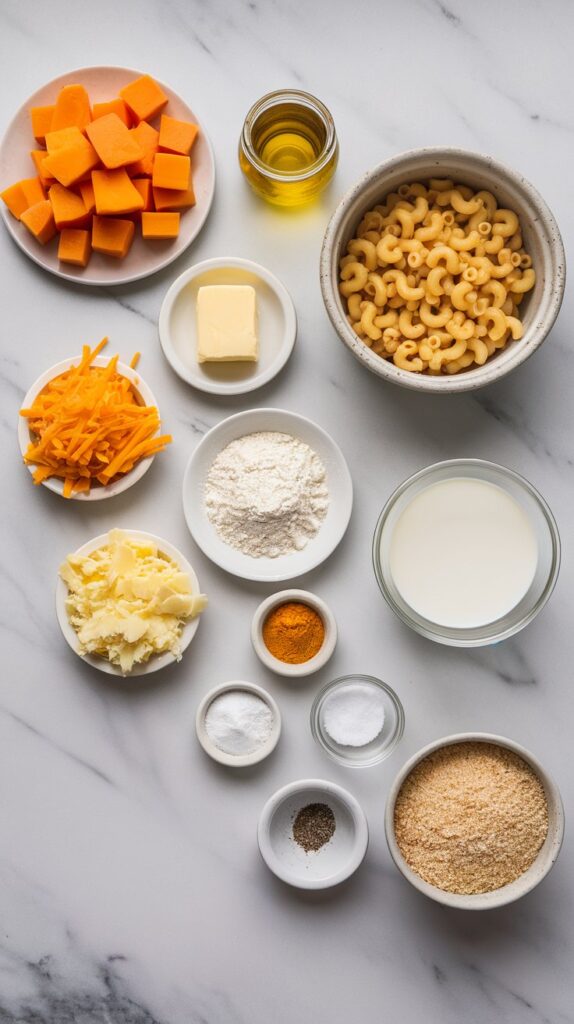
- 3 cups butternut squash, peeled and diced into 1-inch cubes
- 1 tablespoon olive oil
- ½ teaspoon kosher salt
- ¼ teaspoon black pepper
- 8 oz elbow macaroni or pasta shells
- 2 tablespoons unsalted butter
- 2 tablespoons all-purpose flour
- 1 cup whole milk
- 1 cup sharp cheddar cheese, shredded
- ½ cup mozzarella cheese, shredded
- ¼ cup grated parmesan cheese
- ¼ teaspoon ground mustard (optional)
- ½ cup reserved pasta water (as needed)
- ½ cup panko breadcrumbs (optional, for topping)
Pro Tips
- Roast the squash until the edges are golden for deeper flavor
- Use freshly shredded cheese — it melts better than pre-bagged
- Add a splash of pasta water if the sauce gets too thick
- Stir the cheese in off the heat to avoid graininess
- If baking, broil the top for 1–2 minutes for crispy edges
Tools You’ll Need
- Baking sheet + parchment paper
- Blender or food processor
- Pasta pot and strainer
- Large saucepan
- Whisk
- Spatula
- Casserole dish (if baking)
Substitutions and Variations
- Use gluten-free pasta and flour to make it GF
- Swap mozzarella for gruyère or fontina
- Add sautéed spinach, kale, or mushrooms for extra veggies
- Make it spicy with a pinch of cayenne or red pepper flakes
- Use plant-based milk and cheese to make it dairy-free
Make Ahead Tips
Roast and blend the squash ahead of time and store the purée in the fridge for up to 3 days or freezer for 2 months. You can also fully assemble the mac and cheese (uncooked) a day ahead, cover, and bake just before serving.
How to Make Butternut Squash Mac and Cheese
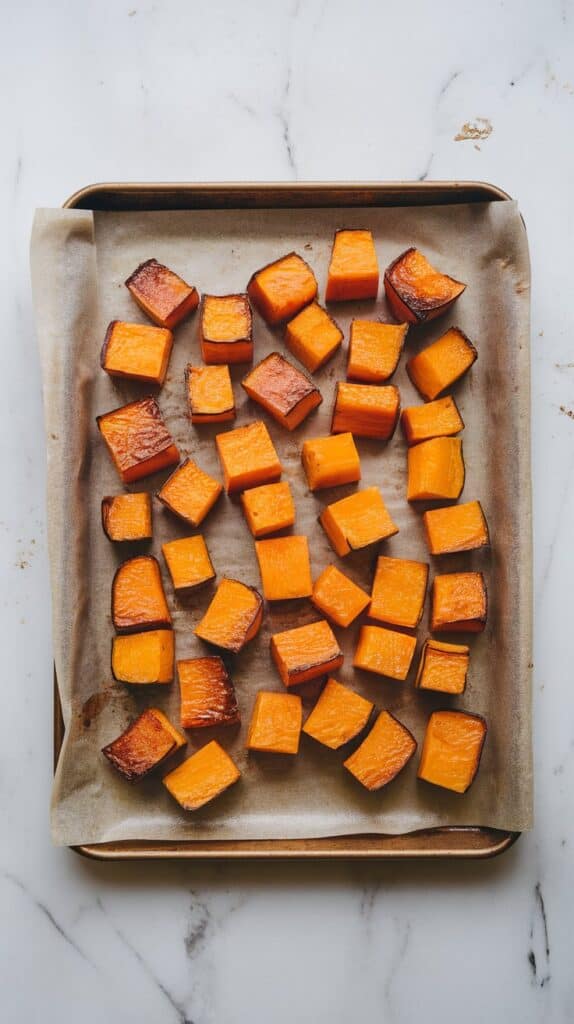
Step 1: Roast the butternut squash
Preheat oven to 400°F (200°C). Toss 3 cups diced butternut squash with 1 tablespoon olive oil, ½ teaspoon kosher salt, and ¼ teaspoon black pepper. Spread on a parchment-lined baking sheet and roast for 25–30 minutes, until soft and golden.
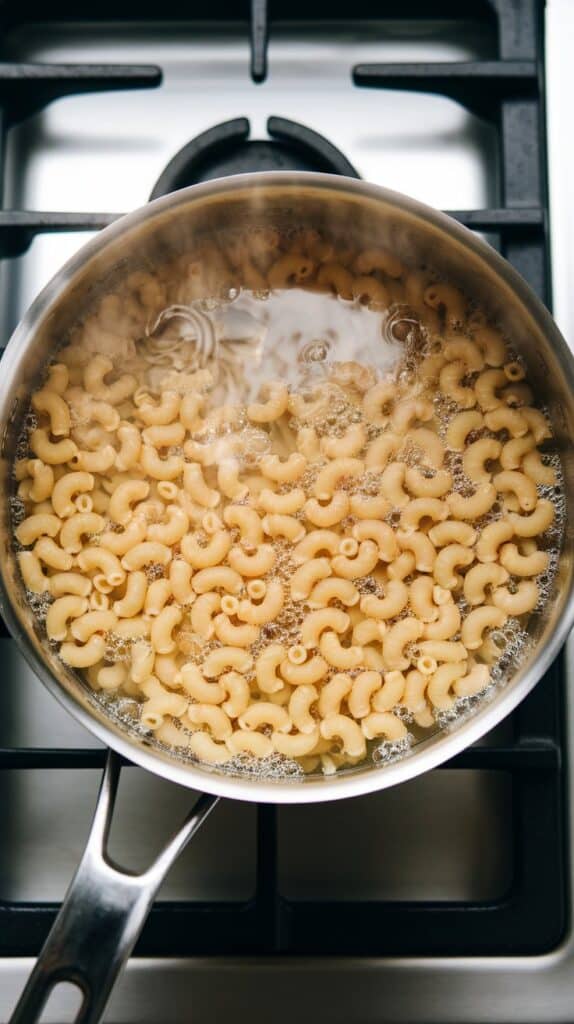
Step 2: Cook the pasta
Boil 8 oz elbow macaroni (or pasta shells) in salted water until al dente. Reserve ½ cup of pasta water, then drain and set aside.
Step 3: Blend the squash
Blend the roasted squash with ½ cup milk until smooth and creamy. Add a little pasta water if needed to help it blend.
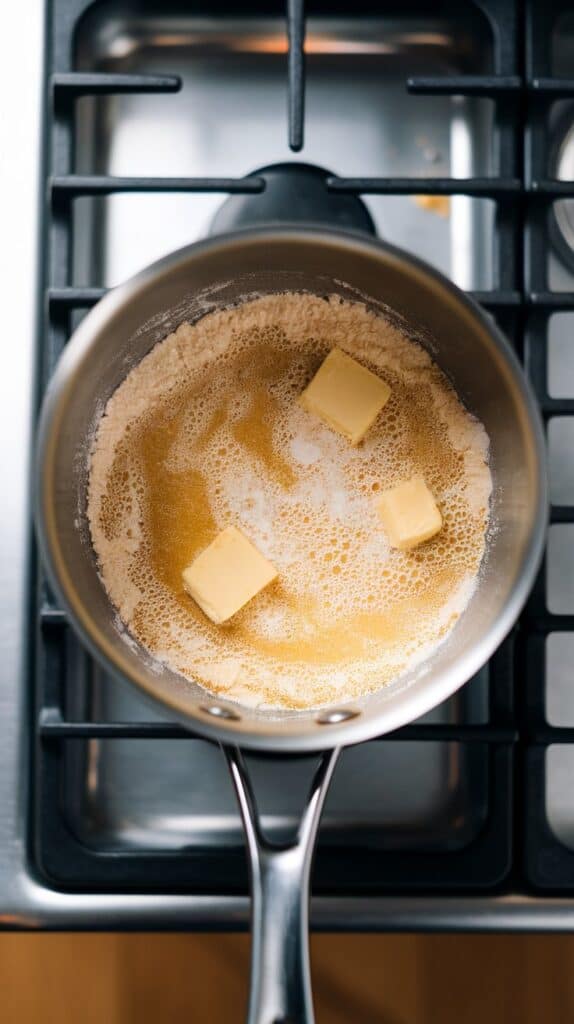
Step 4: Make the roux
In a large saucepan over medium heat, melt 2 tablespoons butter. Whisk in 2 tablespoons flour and cook for 1 minute until bubbly and golden.
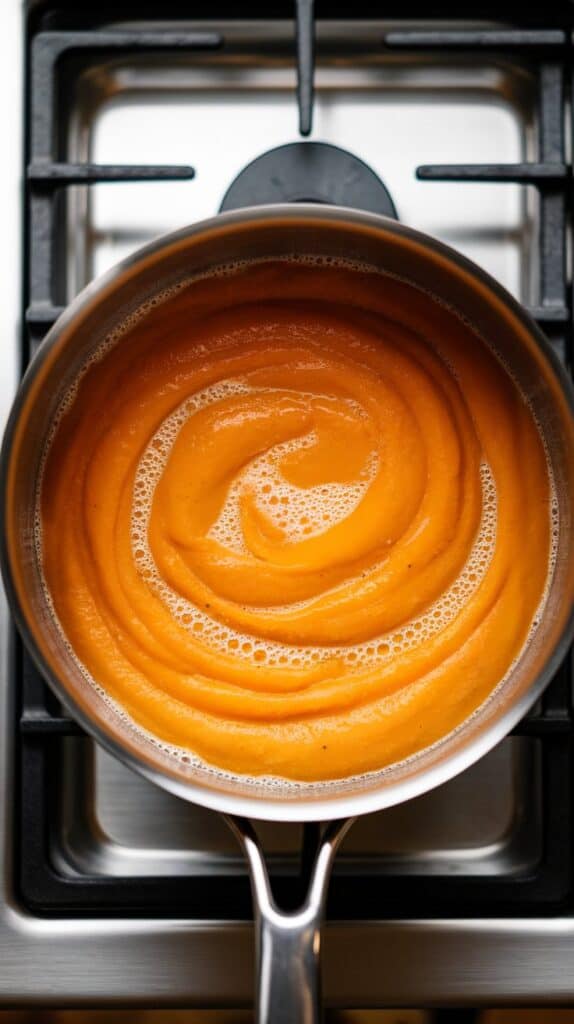
Step 5: Add milk and squash purée
Slowly whisk ½ cup more milk into the roux, then add the blended squash. Stir until smooth and gently simmering.
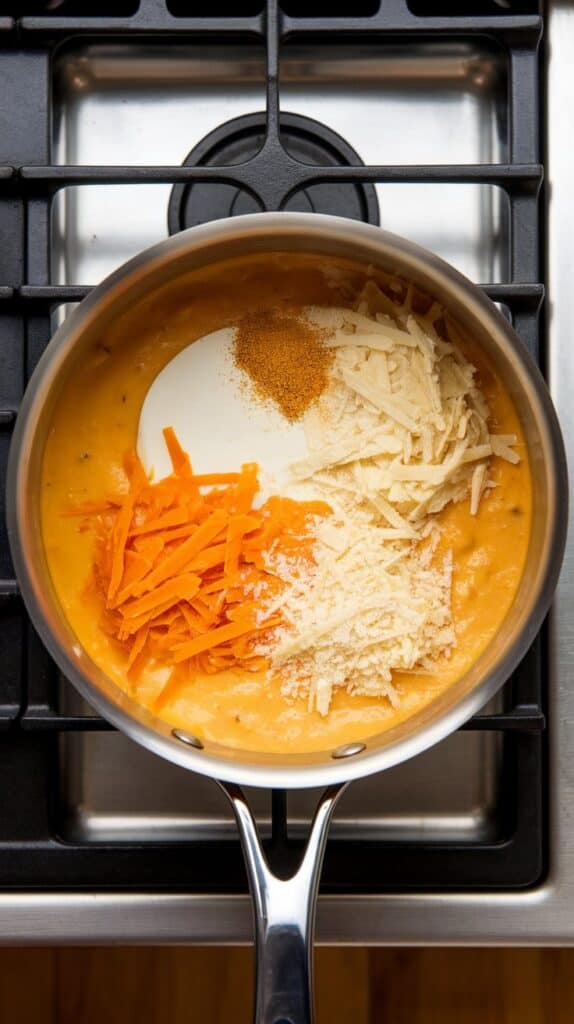
Step 6: Stir in cheeses
Remove pan from heat. Add 1 cup shredded cheddar, ½ cup shredded mozzarella, ¼ cup grated parmesan, and ¼ teaspoon ground mustard. Stir until melted and fully combined.
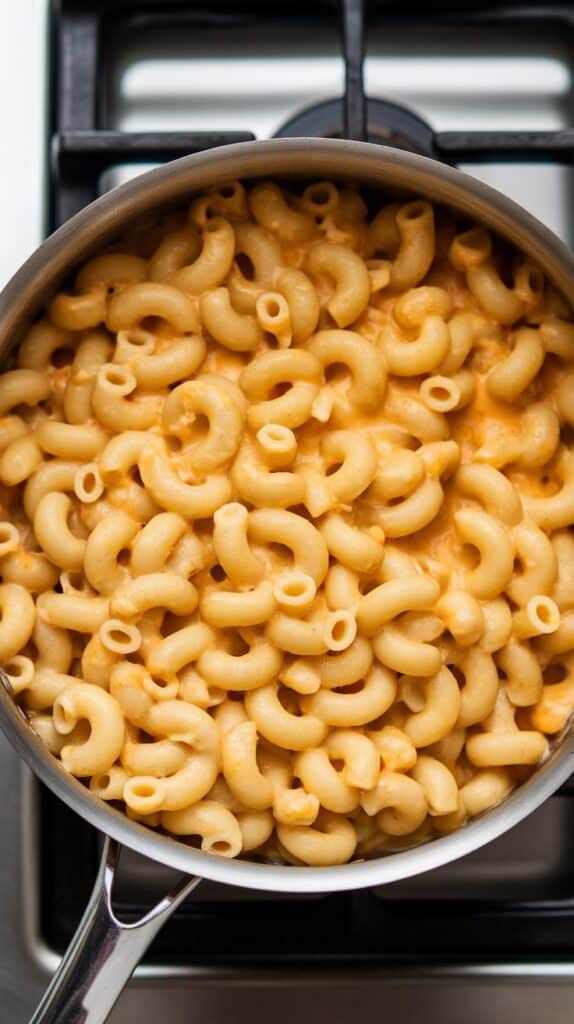
Step 7: Mix with pasta
Add the cooked pasta to the cheese sauce. Stir gently to coat. Add a splash of pasta water if the sauce is too thick.
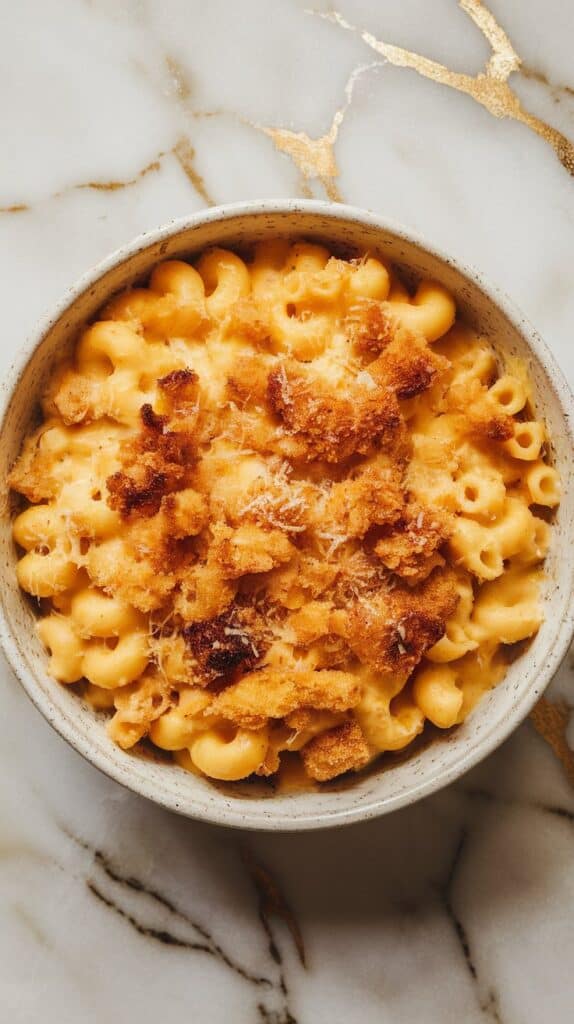
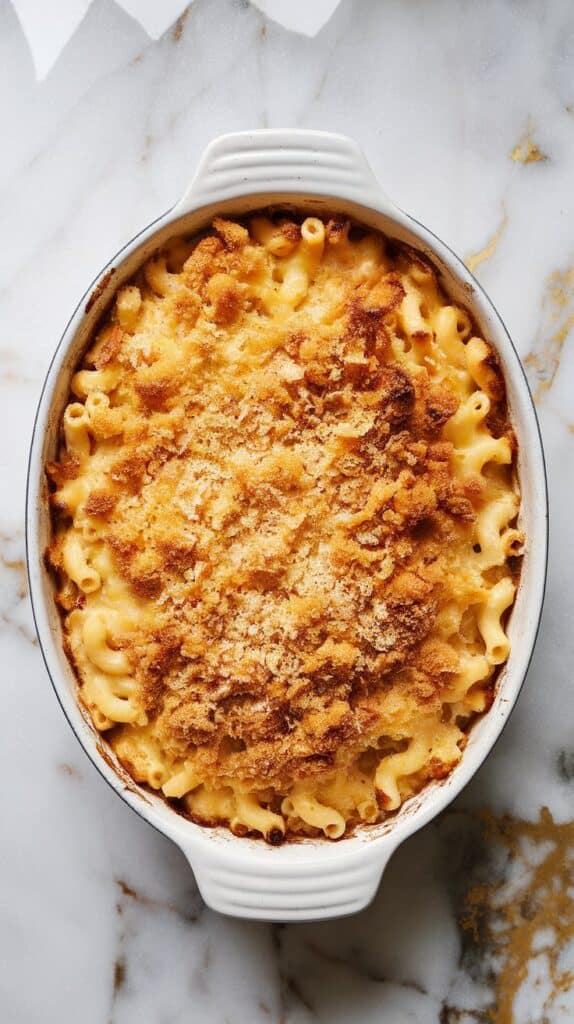
Step 8: (Optional) Bake with breadcrumbs
Pour the mac and cheese into a baking dish. Sprinkle with ½ cup panko breadcrumbs and a little extra cheese. Bake at 375°F (190°C) for 15 minutes, then broil for 2–3 minutes until golden and crispy on top.
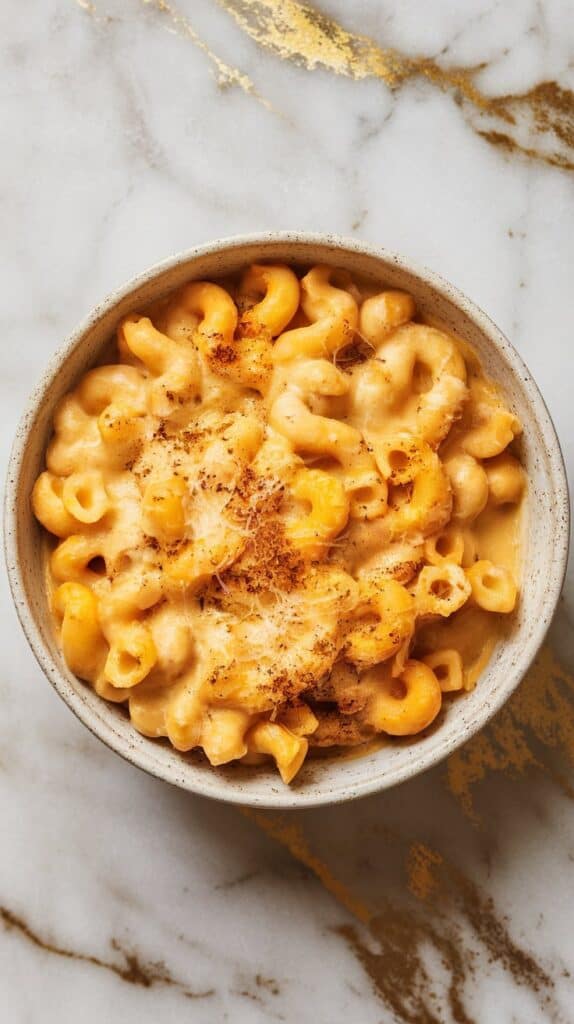
Step 9: Serve
Spoon into bowls and top with more parmesan, if you like. Serve warm.
Servings and Time
Serves: 4
Total Time: 45 minutes
Macros (per serving)
- Calories: 480
- Protein: 18g
- Carbs: 52g
- Fat: 22g
- Fiber: 4g
- Sugar: 6g
Why This Recipe Works (Quick Science)
Roasted butternut squash is naturally creamy, which makes it a perfect base for mac and cheese. Blending it with milk and adding it to a roux makes the sauce super smooth. Stirring in cheese off heat prevents it from breaking and gives that rich, velvety finish.
Common Mistakes
- Skipping the roux: It helps the sauce stay thick and creamy
- Adding cheese while boiling: It can get grainy — always stir it in off heat
- Using too much pasta water: Add it slowly so your sauce doesn’t get watery
- Not seasoning enough: Taste and adjust salt or mustard before serving
What to Serve With
- Roasted broccoli or Brussels sprouts
- A crisp green salad with lemon vinaigrette
- Garlic bread or warm sourdough
- Grilled chicken or baked tofu
- Apple slices or grapes on the side for something fresh
FAQ
Can I use frozen squash?
Yes! Just thaw and roast as usual.
What kind of cheese is best?
Sharp cheddar is a must — you can mix in mozzarella or gruyère for stretch.
Can I skip baking it?
Absolutely. It’s great right off the stove if you want it faster.
Can I make it dairy-free?
Yep — use dairy-free milk and cheese alternatives.
How do I store leftovers?
Fridge for up to 4 days. Reheat with a splash of milk on the stove or in microwave.
Leftovers and Storage
Keep leftovers in an airtight container in the fridge for up to 4 days. Reheat on the stove over low heat or in the microwave with a splash of milk to loosen the sauce. You can also freeze the sauce separately for up to 2 months.
Conclusion
This butternut squash mac and cheese is creamy, cheesy, and full of cozy fall flavor. It’s easy enough for a weeknight but special enough to share. If you make it, come back and drop a comment — I’d love to hear what twist you added or how it turned out!