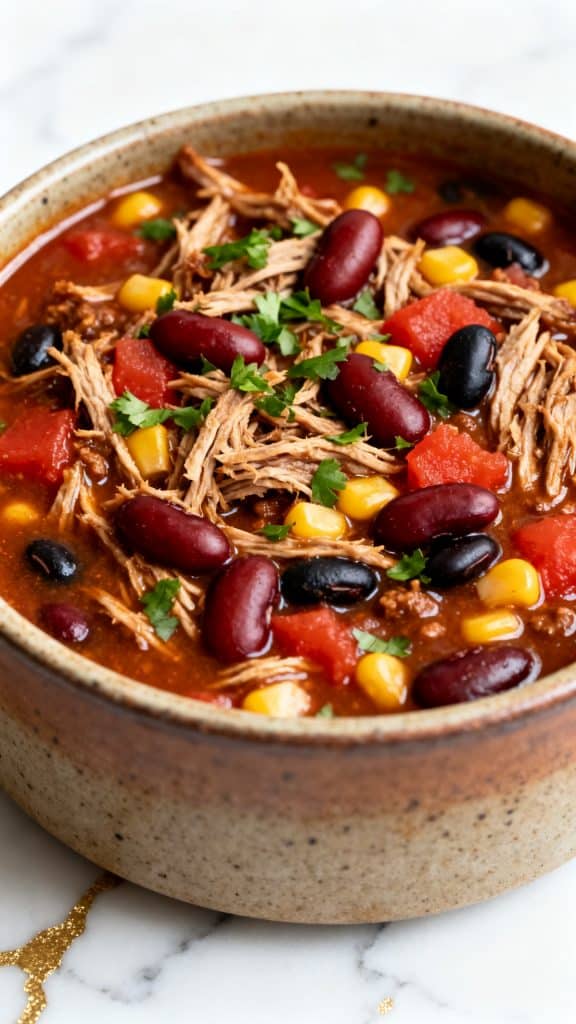
This Crockpot BBQ Pulled Pork Chili is one of those easy comfort food meals that always hits the spot.
It’s smoky, hearty, a little sweet from the BBQ sauce, and packed with tender pulled pork.
The crockpot does most of the work, so it’s perfect for busy days when you want a warm homemade meal waiting for you.
Servings: 8 servings
Prep Time: 15 minutes
Cook Time: 6-8 hours on LOW or 4-5 hours on HIGH
Total Time: About 6 hours 15 minutes

Why I Love This Recipe
The first time I made this chili, I had leftover pulled pork from a weekend barbecue. I tossed it into the crockpot with some pantry staples and hoped for the best. A few hours later, the house smelled amazing and dinner was ready with almost no effort.
Now it has become one of my favorite comfort meals. It feels like classic chili and pulled pork sandwiches had a delicious mash-up.
What I love most:
- Uses simple pantry ingredients
- Great way to use leftover pulled pork
- The crockpot does all the work
- Thick, rich, smoky flavor
- Makes a big batch for meal prep
- Tastes even better the next day
- Easy to customize with toppings
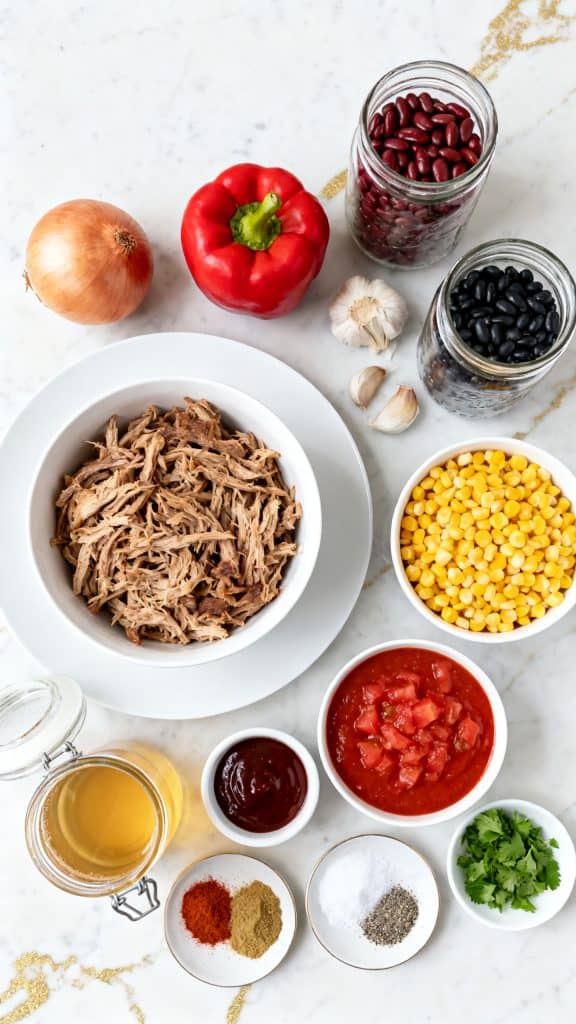
What You’ll Need
- 3 cups cooked pulled pork, shredded
- 1 onion, diced
- 1 red bell pepper, diced
- 2 cloves garlic, minced
- 1 can (15 ounces) red kidney beans, drained and rinsed
- 1 can (15 ounces) black beans, drained and rinsed
- 1 can (15 ounces) sweet corn, drained
- 1 can (28 ounces) diced tomatoes
- 1 can (15 ounces) tomato sauce
- 1 cup BBQ sauce
- 2 cups chicken broth
- 2 tablespoons chili powder
- 1 teaspoon smoked paprika
- 1 teaspoon ground cumin
- 1 teaspoon salt
- ½ teaspoon black pepper
- 2 tablespoons chopped parsley for garnish
Pro Tips
- Use homemade or leftover pulled pork for the best flavor.
- Drain and rinse the beans so the chili doesn’t get too salty.
- For thicker chili, leave the lid off for the last 30 minutes.
- Stir once or twice during cooking if you’re home.
- Let the chili rest for 10 minutes before serving so the flavors settle.
Tools Required
- Black oval crockpot
- Cutting board
- Chef’s knife
- Measuring cups
- Measuring spoons
- Can opener
- Wooden spoon
- Ladle
- Serving bowls
Substitutions and Variations
- Use pork shoulder instead of cooked pulled pork and cook longer.
- Swap black beans for pinto beans.
- Use beef broth instead of chicken broth.
- Add diced jalapeños for extra heat.
- Stir in shredded cheddar cheese before serving.
- Add a can of green chiles for more flavor.
Make Ahead Tips
- Chop the onion and bell pepper the day before.
- Measure spices ahead of time.
- Assemble everything in the crockpot insert the night before and refrigerate.
- Reheat leftovers for quick lunches during the week.
Why This Recipe Works (Quick Science)
The slow cooking process allows the shredded pork to absorb the chili spices, BBQ sauce, and tomato flavors. The beans release starches into the liquid as they cook, helping create a thicker and richer chili. The combination of smoky paprika and BBQ sauce builds deep flavor without needing hours of stovetop cooking.
Recipe Instructions
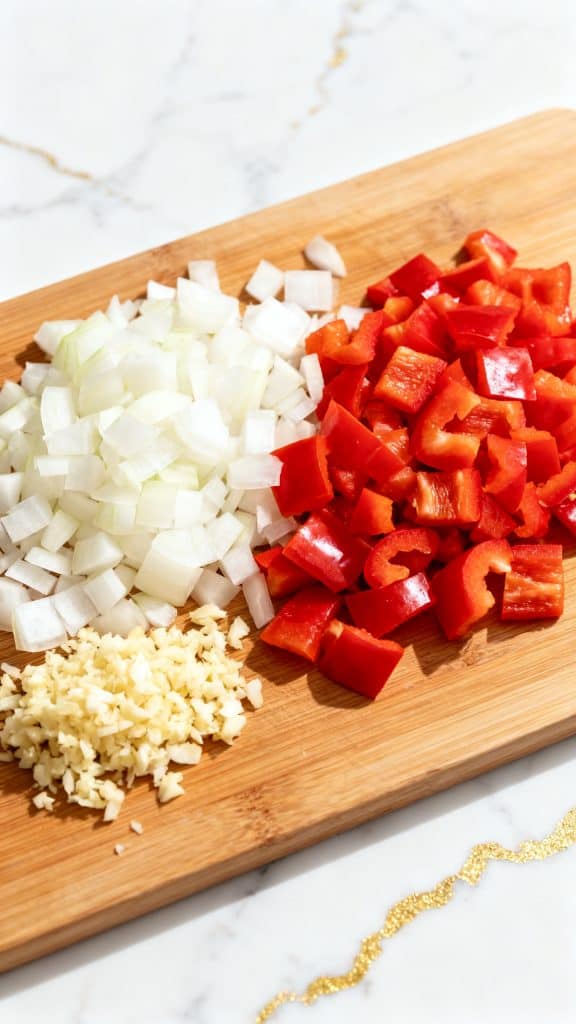
Step 1: Prepare the Vegetables
Dice 1 onion and 1 red bell pepper. Mince 2 cloves garlic.
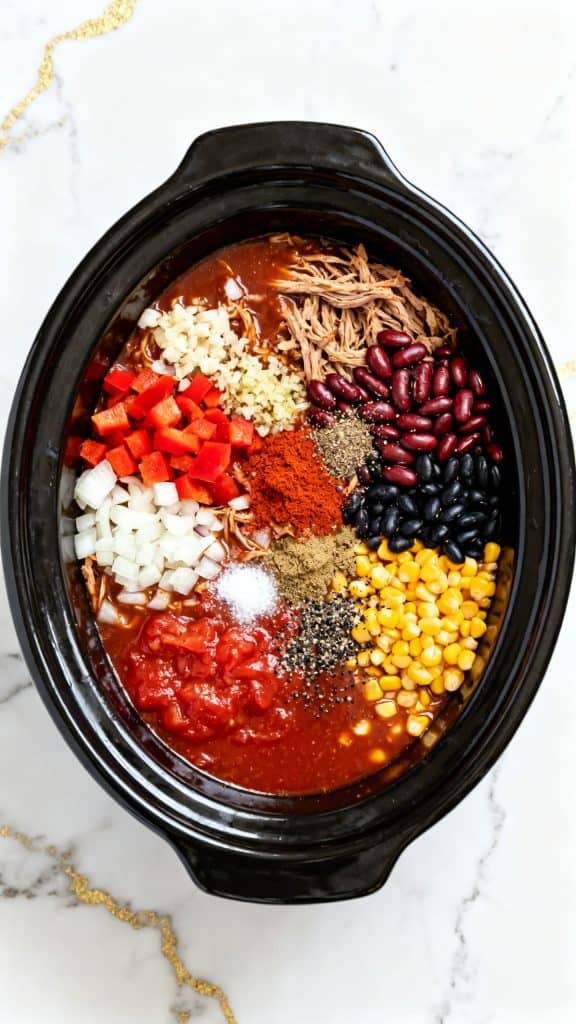
Step 2: Add Ingredients to the Crockpot
Place 3 cups shredded pulled pork, diced onion, diced red bell pepper, minced garlic, 1 can drained red kidney beans, 1 can drained black beans, 1 can drained sweet corn, 1 can diced tomatoes, and 1 can tomato sauce into the crockpot.
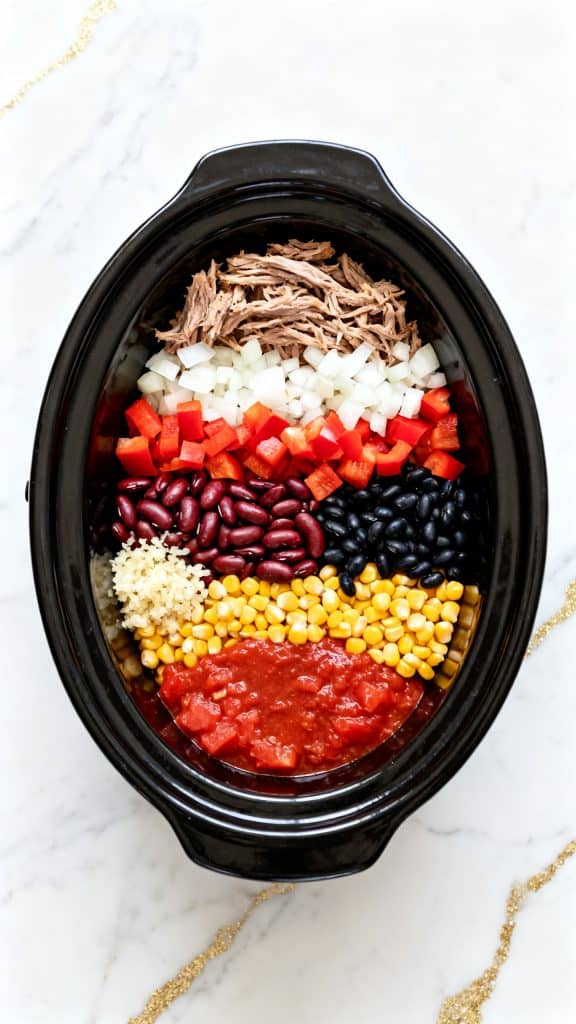
Step 3: Add the Liquids and Seasonings
Pour in 1 cup BBQ sauce and 2 cups chicken broth. Sprinkle in 2 tablespoons chili powder, 1 teaspoon smoked paprika, 1 teaspoon ground cumin, 1 teaspoon salt, and ½ teaspoon black pepper.
Step 4: Stir Everything Together
Stir well until all ingredients are evenly mixed.
Step 5: Slow Cook
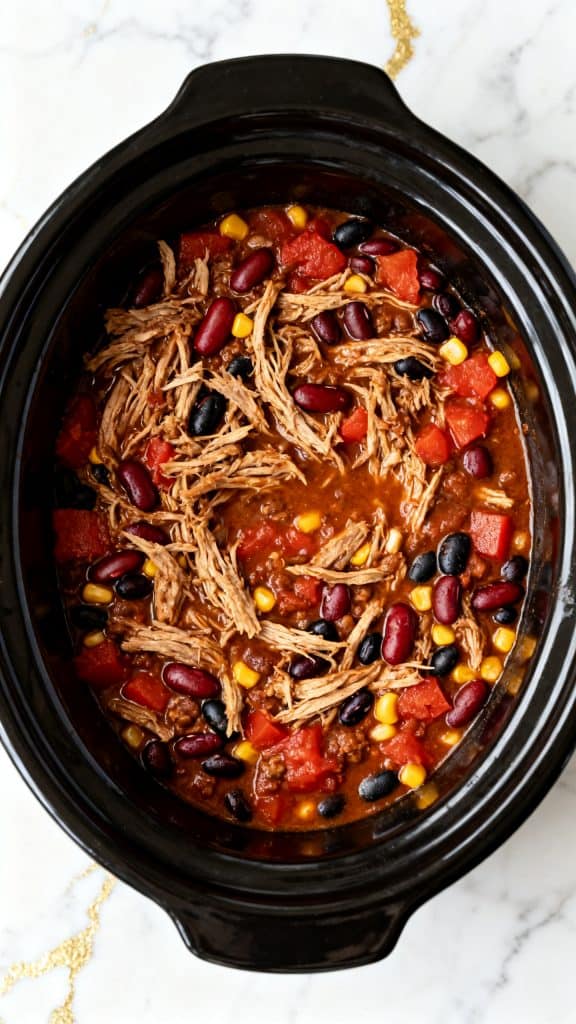
Cover and cook on LOW for 6-8 hours or HIGH for 4-5 hours.
Step 6: Finish and Serve
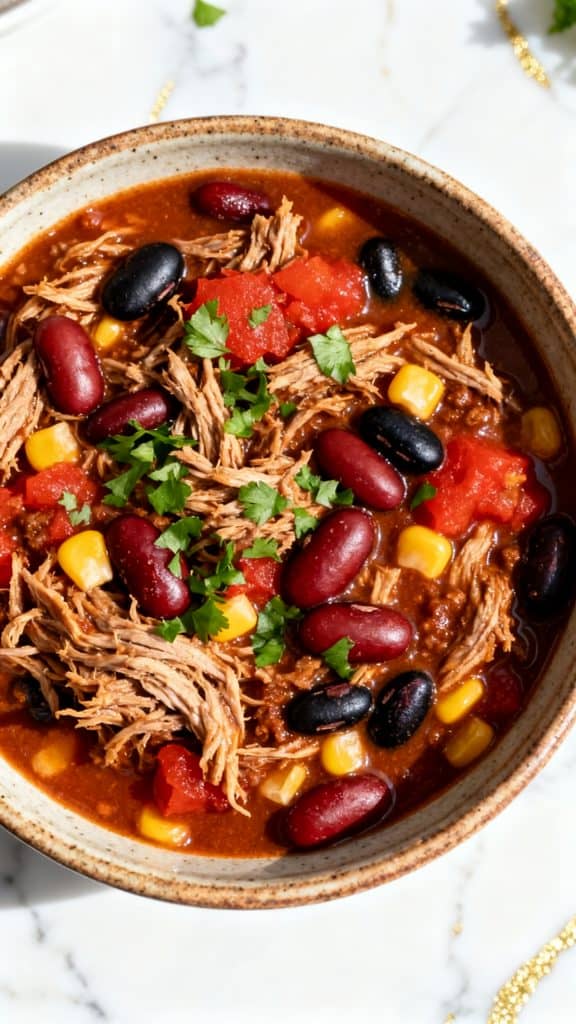
Stir the chili and ladle into bowls. Garnish each serving with 2 tablespoons chopped parsley.
Common Mistakes
- Adding too much broth can make the chili thin.
- Forgetting to drain the beans may water down the flavor.
- Cooking too long on HIGH can make the pork overly soft.
- Not stirring before serving can leave ingredients unevenly distributed.
- Using very sweet BBQ sauce may overpower the chili spices.
What to Serve With
- Cornbread
- Garlic bread
- Buttermilk biscuits
- Baked potatoes
- Coleslaw
- Simple green salad
- Shredded cheddar cheese
- Sour cream
- Sliced green onions
Leftovers and Storage
- Refrigerate leftovers in an airtight container for up to 4 days.
- Freeze for up to 3 months.
- Thaw overnight in the refrigerator before reheating.
- Reheat on the stovetop or in the microwave until hot throughout.
- The flavor gets even better after a day in the refrigerator.
Macros Information
Approximate per serving (8 servings):
- Calories: 390
- Protein: 30g
- Carbohydrates: 31g
- Fat: 16g
- Fiber: 8g
- Sugar: 11g
- Sodium: 920mg
FAQ
Q: Can I use leftover pulled pork?
A: Yes. Leftover pulled pork works perfectly and adds lots of flavor.
Q: Can I freeze this chili?
A: Absolutely. Cool it completely and freeze in airtight containers for up to 3 months.
Q: Can I make it spicy?
A: Yes. Add diced jalapeños, cayenne pepper, or hot sauce.
Q: Can I cook it overnight?
A: Yes. Use the LOW setting and let it cook while you sleep.
Q: Can I use different beans?
A: Yes. Pinto beans, chili beans, or great northern beans all work well.
Final Thoughts
This Crockpot BBQ Pulled Pork Chili is the kind of meal that makes dinner easy and satisfying. The smoky BBQ flavor, tender pulled pork, and hearty beans come together into one big bowl of comfort food. Whether you’re using leftover pulled pork or making it just for this recipe, it’s a simple meal that delivers big flavor with very little effort. Give it a try, and don’t forget to come back and share how it turned out and any tips you discovered along the way.